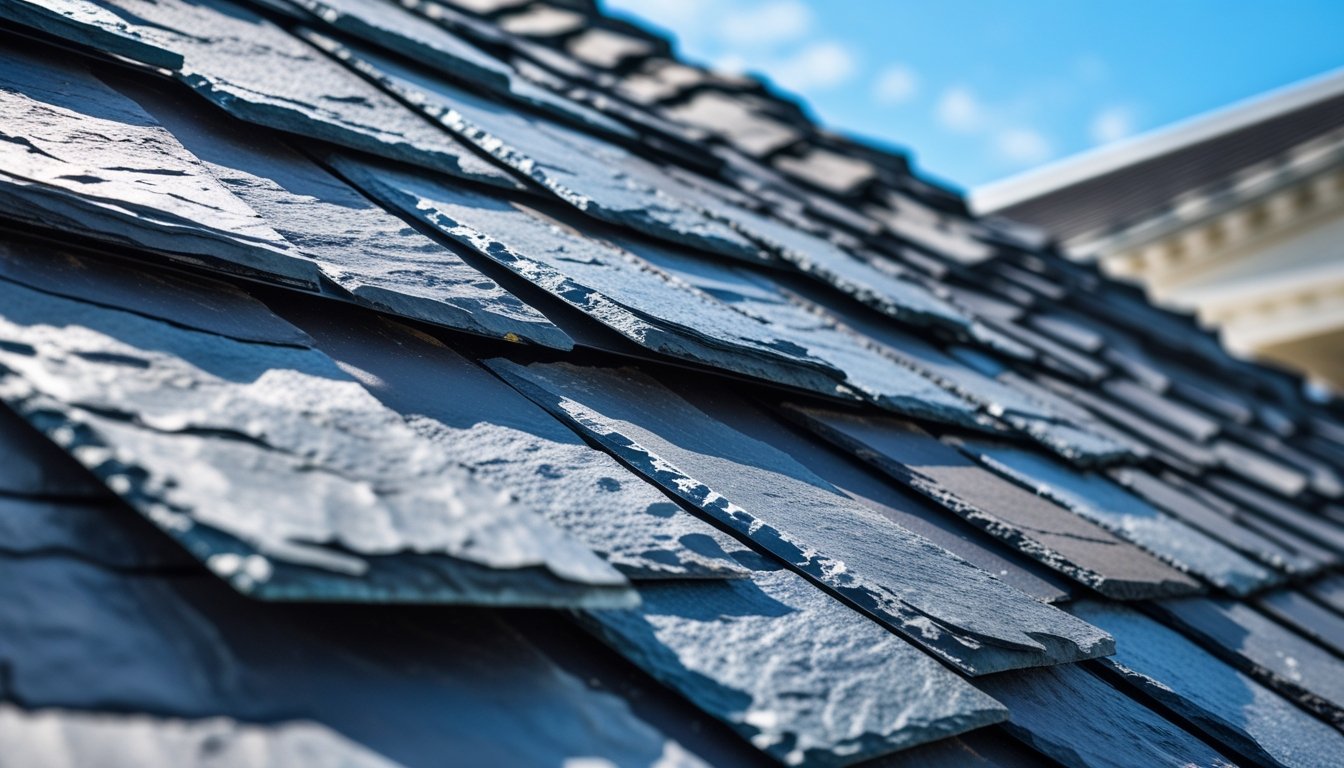
Slate roofing is one of the most enduring and visually refined roofing systems in use today. Its natural stone composition delivers strength, fire resistance, and elegance that enhance both traditional and modern architecture.
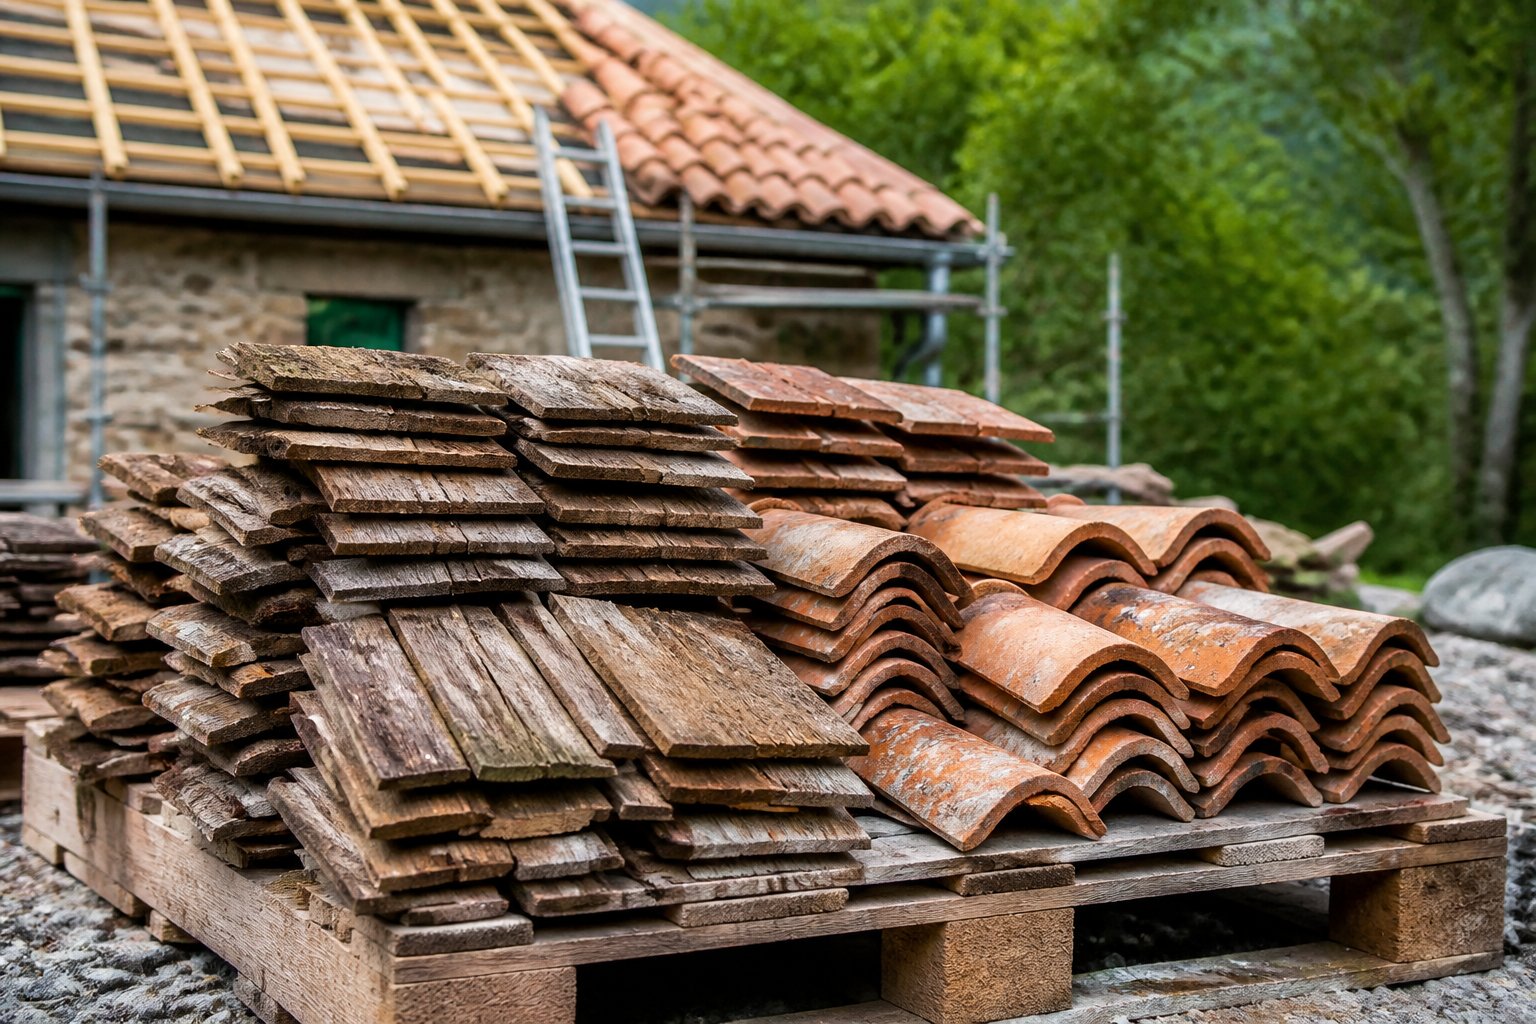
Reclaimed Slate Roofing helps builders, architects, and homeowners achieve authentic, lasting results using real, historic slate. Each piece is carefully inspected, ensuring reliable installation and unmatched visual character.
This article provides a complete breakdown of slate roofing details—from materials, installation, and flashing to maintenance and preservation. You’ll learn how precision, planning, and the right reclaimed slate combine to create durable, elegant roofs built to last for generations.
Understanding Slate Roofing
Slate roofing is a durable, natural roofing material with unique aesthetic and environmental benefits. It requires proper installation to last for decades and offers various types that differ in color, texture, and source.
What Is Slate Roofing?
Slate roofing uses thin slabs of natural stone called slate. These slabs are cut into tiles that form a roof covering. Slate is durable and resists fire, water, and harsh weather. Proper installation is important. Slate tiles are typically nailed to wooden roof decks. The tiles overlap to create a waterproof barrier.
Unlike other roofing materials, slate does not need frequent repairs when installed well. You can get new slate or reclaimed slate from historic buildings. Using reclaimed slate supports sustainability by reducing waste and preserving authentic materials.
Benefits of Slate Roofing
Slate roofs last 75 to over 100 years when installed correctly. Their longevity means fewer replacements, which saves money over time. Slate’s natural composition makes it fireproof and resistant to rot and insect damage.
Environmental benefits also matter. Slate is mined or reclaimed without heavy manufacturing, which lowers its carbon footprint. Using reclaimed slate is an eco-friendly choice since it repurposes sound historic materials.
Slate roofs add value thanks to their elegant look. The natural color and texture fit many architectural styles. Slate is also low-maintenance, requiring only occasional checks for broken tiles or flashing issues.
Common Types of Slate
Slate varies by color, texture, and origin. Common colors include gray, green, purple, black, and red. The appearance depends on the quarry and the minerals in the slate.
Types you might encounter:
- Crosscut slate: Cut across the grain, showing natural surface texture.
- Cleavage slate: Sawn along natural layers, giving a smoother finish.
Weathering also affects slate. Some colors may lighten or darken with sun and rain exposure. Knowing these differences helps you select the right slate for your project.
We offer a range of authentic, high-quality slates. This lets you access rare and durable materials that enhance your roof’s character.
Key Slate Roofing Details
Slate roofing relies on precise materials, proper sizing, and a strong underlying structure. Getting these details right ensures your roof lasts longer and performs well in all weather.
Components of a Slate Roof
A slate roof mainly consists of slate tiles, underlayment, battens, and flashing. Slate tiles are the visible surface and provide durability. Underlayment acts as a moisture barrier between the roof deck and slate.
Battens, thin strips of wood or metal, hold and space the slates properly. Flashing is installed around roof penetrations like chimneys and valleys to prevent leaks. Slate tiles must be fastened securely, usually with copper or stainless steel nails, to avoid corrosion.
Properly installed flashing and underlayment help maintain a weathertight system. Using quality components from trusted sources can save time and avoid costly repairs.
Slate Size and Thickness Options
Slate comes in various sizes, ranging commonly from 8”x16” to 16”x24”. Thinner slates, about 1/4” thick, are lighter but less durable, while thicker slates up to 3/8” are heavier and stand up better to harsh weather.
Standard industry practice often defines a "square" of slate as enough tiles to cover 100 square feet. Size and thickness affect installation methods and roof weight, so you must consider your structure's capacity.
Mixing slate from several pallets during installation helps blend colors and textures, which is vital for authentic-looking roofs. Reclaimed slates from specialty suppliers provide unique sizes and natural character, ideal if you want a historic or custom look.
Typical Slate Roof Structure
A typical slate roof structure starts with a solid roof deck, usually plywood or wood plank, that supports the slate’s weight. Over this, you install an underlayment like roofing felt or synthetic membrane for water protection.
Battens or counter-battens are spaced evenly to attach slates while allowing airflow beneath for ventilation. You also need metal flashing at joints, valleys, and roof edges to prevent leaks. Pitch is important; slate roofs require steep slopes (often 4:12 or more) to shed water efficiently.
We can supply slates tested for strength and thickness to meet these structural demands. A well-built slate structure balances durability with proper drainage and airflow, ensuring your roof’s long-term performance.
Slate Roof Installation Basics
Installing a slate roof requires careful attention to the tools you use, the preparation of the roof base, and how you arrange the slates on your roof. Each step affects the durability and appearance of the finished roof.
Proper preparation and layout are essential to prevent water leaks and ensure the slate lasts for decades.
Required Tools and Materials
To handle the material safely and precisely during a slate roof installation, you need specific tools. Essential tools include a slate cutter or nipper for shaping tiles. A hammer with a smooth face is recommended to avoid damage.
Roofing nails, preferably copper or stainless steel, are used to prevent rust. Additionally, a slate ripper is necessary for replacing broken tiles later. Materials you will use are reclaimed slate or new slate, roofing felt or synthetic underlayment, roofing nails, and wood battens or a sturdy plywood deck.
Using authentic reclaimed slate from reliable suppliers ensures you get durable, historically accurate tiles vetted for quality. Safety gear like gloves and eye protection is also important since slate is a hard, brittle material.
Substrate and Underlayment Preparation
The roof deck must be solid, flat, and clean before installation begins. Typically, a plywood deck is preferred for strength and stability. Over the deck, install an underlayment such as roofing felt or a synthetic membrane to create a weatherproof barrier.
This material prevents water from seeping into the structure if a slate tile breaks or shifts. You may also install wood battens horizontally across the roof. These battens support the slate tiles and provide attachment points. They should be spaced based on the size of your slate tiles.
Using a good-quality underlayment and a smooth substrate keeps your slate roof secure and extends its lifespan.
Slate Layout Patterns
The way you arrange the slates affects both the roof’s appearance and its function. Common patterns are straight-lay and random courses. Straight-lay involves rows of slates of the same size, creating a uniform look. Random courses mix different sizes, which can be less expensive and offer a unique aesthetic.
Your layout must consider overlap; each slate should cover the top of the one below it to divert water properly. Standard headlap (the vertical overlap) is about 3 inches, but can vary depending on the climate.
When working with reclaimed slate, expect small size variations. Measure carefully and plan your layout before nailing tiles in place to avoid gaps and maintain a tight, weatherproof surface.
Flashing and Waterproofing
Flashing is critical to protecting your slate roof from water damage. It seals edges and joints where slate meets other materials or roof features. Waterproofing works alongside flashing to stop leaks and extend your roof’s life.
Valley Flashing Methods
Valleys collect a lot of water, so flashing here must be strong and well-installed. Use non-corrosive metals like copper or lead to match the slate’s durability.
Two common valley flashing types are:
- Open Valley: Flashing visible and installed at the center of the valley. Slate edges are cut back to expose metal, which channels water quickly.
- Closed Valley: Slate overlaps the valley metal, hiding the flashing. This method offers a cleaner look but needs careful water flow management.
Proper valley flashing prevents leaks where water flow changes direction. Your installer should fit the flashing with enough overlap and secure it firmly to withstand the weather.
Chimney and Dormer Flashing Details
Chimneys and dormers create vertical surfaces that must be sealed tightly against the slate. Step flashing is used, bending metal into small pieces that overlap with each course of slate.
Key points:
- Flashing must run at least 4 inches up the vertical surface and 4 inches onto the slate.
- Each piece overlaps the one below, shedding water away from the chimney or dormer.
- Counter-flashing covers the step flashing to form a waterproof barrier.
Well-executed flashing here avoids water leaks that can damage the roof deck and interior walls.
Gutter and Eave Protection
Slates over gutters and eaves require flashing and waterproof layers to control water exit. The flashing should extend past the fascia to direct water into gutters. Install a sturdy drip edge made of metal along eaves.
This prevents water from running back under the slate or behind gutters, reducing rot and freeze damage. In addition, waterproof underlayment under the slate provides a second line of defense against wind-driven rain.
Proper gutter and eave flashing ensures controlled water flow off the roof and protects your building’s structure.
Fastening and Fixing Techniques
To secure slate roofing properly, you must focus on using the right nails or hooks, apply correct overlapping to prevent leaks, and avoid damaging the slate by using precise nailing. These details affect the durability and weather resistance of your roof.
Nail Selection for Slate Roofing
Choose nails carefully. Copper or stainless steel nails are best because they resist rust and last for decades. Avoid iron or cheap nails because they will corrode and stain the slate. Your nails should be 1.5 to 2 inches long to hold the slate firmly without cracking it.
Use nails with a smooth shank and sharp point to prevent breaking the slate when driving them in. Set nails properly—over-nailing or under-nailing stresses the slate, causing cracks over time. The nail head should sit flush but not overly tight against the slate to allow for natural expansion and contraction.
Hook and Clip Fixing Options
Hooks and clips provide an alternative to nailing, especially on steep slopes or when dealing with thin or fragile slates. These metal fasteners grab the slate without penetrating it, reducing breakage risks.
Hooks are usually made of copper or stainless steel and fit under the slate above, hooking it to the roof deck or battens for secure attachment. Clips work similarly but attach more firmly around the slate edges.
They are useful in areas with high wind or heavy snowfall where extra hold is critical. Using hooks or clips can increase the lifespan of your slate roof and reduce repair frequency.
Correct Slate Overlaps
Proper overlap, called headlap, prevents water from seeping between the slates. Standard overlaps are 2 to 3 inches, depending on roof slope. For steeper roofs (above 4:12 pitch), a 2-inch overlap usually works. Increase overlap to at least 3 inches on lower slopes to handle slower water runoff.
Adjust overlaps carefully when using reclaimed slats of mixed sizes. Consistent lap improves weatherproofing and distributes weight evenly. Both nail and hook fixing methods depend on correct overlap for roof durability.
Ridge, Hips, and Edge Details
Ridge, hip, and edge areas need careful attention to prevent leaks and maintain roof strength. Proper materials and installation methods extend the lifespan of your slate roof and ensure it performs well under wind and weather.
Ridge and Hip Slate Capping
Ridge and hip capping protects roof peaks and angles by covering slate edges. Install a saddle ridge or roll-vented ridge with felt underlay that extends 6 to 8 inches over the ridge. Apply elastic cement to overlap joints and secure slate with at least two nails each.
Metal ridge caps should be made from non-corrosive materials like copper or stainless steel. Attach these caps using hidden clips to cover the last course of slates and prevent water penetration. Proper overlap and ventilation reduce moisture buildup and ice dam risks.
Eave Protection Strategies
At the eaves, extra protection prevents water from getting under the slates. Install a layer of underlayment wrapped over the eave edge, secured with a wood nailer beneath to hold it in place. This acts as a moisture barrier and protects the roof deck from wind-driven rain.
Use corrosion-resistant flashing along eaves and valleys to direct water off the roof. Check that the underlayment extends far enough past the slate exposure line. Regular inspections at these points help spot early damage and avoid costly repairs.
Gable End Treatments
Gable ends receive concentrated wind pressure and need sturdy flashing and slate layout. Bend a ridge or hip base material to the roof pitch and center it on the gable edge. This forms a base for the cap and seals the joint between the slates and the wall.
Install ridge or hip caps using the same method as other ridges—overlapping with elastic cement and nails for a tight seal. Metal flashing should cover any exposed joints to prevent water entry and resist corrosion.
Ventilation and Insulation Considerations
Proper airflow and insulation are key to protecting your slate roof from moisture and temperature damage. You need to manage how air moves through your roof space and place insulation correctly to avoid problems like ice dams or condensation.
Energy Efficiency Benefits of Proper Roof Ventilation
Ventilation in slate roofing systems supports both durability and energy efficiency. Research from the U.S. Department of Energy shows that well-ventilated roof assemblies can lower attic temperatures by up to 30°F in summer, reducing cooling loads.
Balanced ridge and soffit vents allow airflow that prevents moisture buildup and stabilizes indoor comfort year-round. For historic or reclaimed slate roofs, improving ventilation also prevents condensation-related damage to wood decking and nails.
Combining proper airflow with correct insulation depth creates a more energy-efficient envelope while preserving the roof’s natural cooling and protective qualities. These details ensure your slate roof performs beautifully in all seasons.
Ventilation Methods for Slate Roofs
Slate roofs require effective ventilation to prevent moisture buildup. Ridge vents at the peak and soffit vents along the eaves work well together. This setup lets cool air enter low points and warm, moist air escape at the top.
Adding roof vents before insulation installation is best. This helps clear moist air and keeps the roof deck dry. Avoid patching valleys with tar, which traps moisture and damages slate. Consider local climate: in cold areas, ventilation keeps the roof surface cold to reduce ice dams. In hot climates, it cools attic air to protect shingles and your home’s interior.
Insulation Placement Guidelines
Place insulation carefully to avoid blocking ventilation paths. Install insulation below the roof rafters, not directly against the underside of the slate or roof deck. This allows air to flow freely above the insulation layer.
Use insulation materials, such as rigid foam or fiberglass batts, that work well with ventilated roofs. Avoid compressing insulation, which reduces its effectiveness. Check building codes for proper insulation depth and placement.
Roofs restored with reclaimed slate from trusted companies benefit from updated insulation techniques that enhance longevity and energy efficiency without altering historic appearance.
Durability and Maintenance Tips
Slate roofs last a long time, often over 75 years, but they need regular care to stay in good shape. You should check for damage, fix problems quickly, and follow simple steps to keep your roof strong.
Inspecting Slate for Damage
Inspect your slate roof at least twice a year, ideally in spring and fall. Look closely for cracked, broken, or slipped slates. Damage often happens after strong winds, hail, or heavy storms. Pay attention to areas near chimneys, valleys, and roof edges, as these spots are more prone to wear.
Use binoculars or a safe ladder to get a good view without stepping on the roof. Watch for signs like water stains inside your home or loose debris around gutters—these can signal slate damage or improper water flow. Document any issues and act quickly to avoid bigger problems.
Common Repair Methods
Replacing broken slates is the main repair you will do. Remove damaged tiles carefully so you don’t harm the surrounding ones. Use slate hooks or copper nails to secure new slates, matching size and thickness to keep the roof uniform.
For small cracks, you can sometimes apply roofing adhesive, but full replacement is best if the slate is badly damaged. Avoid patching with materials different from slate to maintain durability and appearance.
If flashing is damaged or gutters clog, those should be fixed promptly. Proper water drainage protects the roof’s foundation and slows slate wear.
Preventative Maintenance Practices
Keep your slate roof free from debris like leaves and branches by cleaning gutters and valleys regularly. Blocked water flow causes leaks and accelerates slate damage. Trim nearby trees to prevent falling branches from breaking tiles.
Also, avoid walking directly on the slate. If work is needed, use roof walkers or boards to spread your weight. Use our authentic materials for any repairs or replacements. Their slates are vetted for durability and fit historic roofing styles, helping your roof preserve its strength and look for decades.
Historic Slate Roofing Practices
Slate roofs on historic buildings show careful design and skilled craftsmanship. You need to preserve these features to keep the roof’s character and function. This involves using specific repair methods and recognizing notable architectural styles tied to slate roofing.
Preservation Techniques
When repairing historic slate roofs, focus on fixing rather than replacing slates. Damaged or loose pieces should be carefully reset or patched using matching slate from similar eras. Avoid modern materials that don’t match the original in texture or color.
Use copper or stainless steel nails to prevent corrosion. Keep original patterns and details intact, as they define the roof’s look and durability. If you need new slates, turn to reputable suppliers for authentic, reclaimed materials that match historic roofs.
Avoid unqualified contractors. Improper repairs can cause long-term damage and loss of historic integrity. Proper inspection by a roofing expert helps identify failures caused by weather, structure shifts, or past mistakes.
Notable Architectural Examples
Many historic buildings feature slate roofs with distinct patterns and cuts that add architectural value. You’ll find multi-colored slate arranged in decorative bands, scalloped edges, or diamond shapes. These details are not just aesthetic; they help with water drainage and roof strength.
Famous examples include 19th-century mansions and public buildings with steep-pitched roofs using slate from regions known for quality stone. The authenticity and durability of original slates often outlast modern materials by decades.
Using authentic reclaimed slate helps match these intricate designs. Reclaimed slate has the right thickness, texture, and aging, keeping your restoration true to the building’s history and making your work stand out.
Crafting Longevity Through Precision Slate Detailing
Every successful slate roof relies on precision, planning, and craftsmanship. Attention to details—such as proper flashing, correct overlap, and secure fastening—ensures performance that can exceed a century.
Reclaimed Slate Roofing provides authentic, time-tested materials that meet these technical demands. Their carefully vetted reclaimed slates bring history, durability, and environmental integrity to every project.
Invest in a roofing system built to last generations. Call today to request a quote or schedule nationwide delivery of real reclaimed slate for your next restoration or custom build.
Frequently Asked Questions
Slate roofs last many decades with proper care. They handle most weather types well, but need the right underlayment and installation methods. Knowing how to handle specific details like the roof ridge ensures your slate roof performs as it should.
What is the typical lifespan of a slate roof?
A natural slate roof can last 75 to 100 years or more. Some slats, especially those reclaimed from historic buildings, have proven durability beyond a century. This long lifespan reduces the need for frequent replacement, saving time and money in the long run.
Can slate roofs withstand extreme weather conditions?
Slate is highly resistant to hail, wind, and heavy rain. It can handle freeze-thaw cycles without cracking. However, slate is brittle and can break under sharp impact, so falling branches or heavy debris are risks to watch for during storms.
What are the recommended underlayment materials for slate roofing?
Use a high-quality, waterproof underlayment to protect against moisture. Synthetic underlayments or traditional felt paper, properly installed, provide a reliable barrier. The underlayment should be tear-resistant and suitable for steep slopes typical of slate roofing.
How does the installation process of slate roofing differ from other materials?
Slate installation requires specialized tools and skills. Each slate is fastened individually with copper or stainless steel nails to avoid rust. The process is slower and more labor-intensive than installing asphalt shingles or metal roofs. Proper spacing and alignment are critical for durability and appearance.
What maintenance is required for a slate roof?
Regular inspections every few years help catch broken or slipped slates early. Clean gutters and remove debris from the roof surface. Replace damaged slates promptly using matching reclaimed pieces for authenticity and durability. Avoid walking on the roof except where necessary to prevent breakage.
How do you properly install a slate roof ridge?
The ridge requires specially cut slate pieces or metal ridge caps designed for slate roofs. Begin at the eaves and work upward, overlapping.