Installing slate roofing demands precision, craftsmanship, and proper materials to achieve both longevity and visual integrity. Slate is a natural stone known for its strength and elegance, but installation quality directly affects its lifespan and performance.
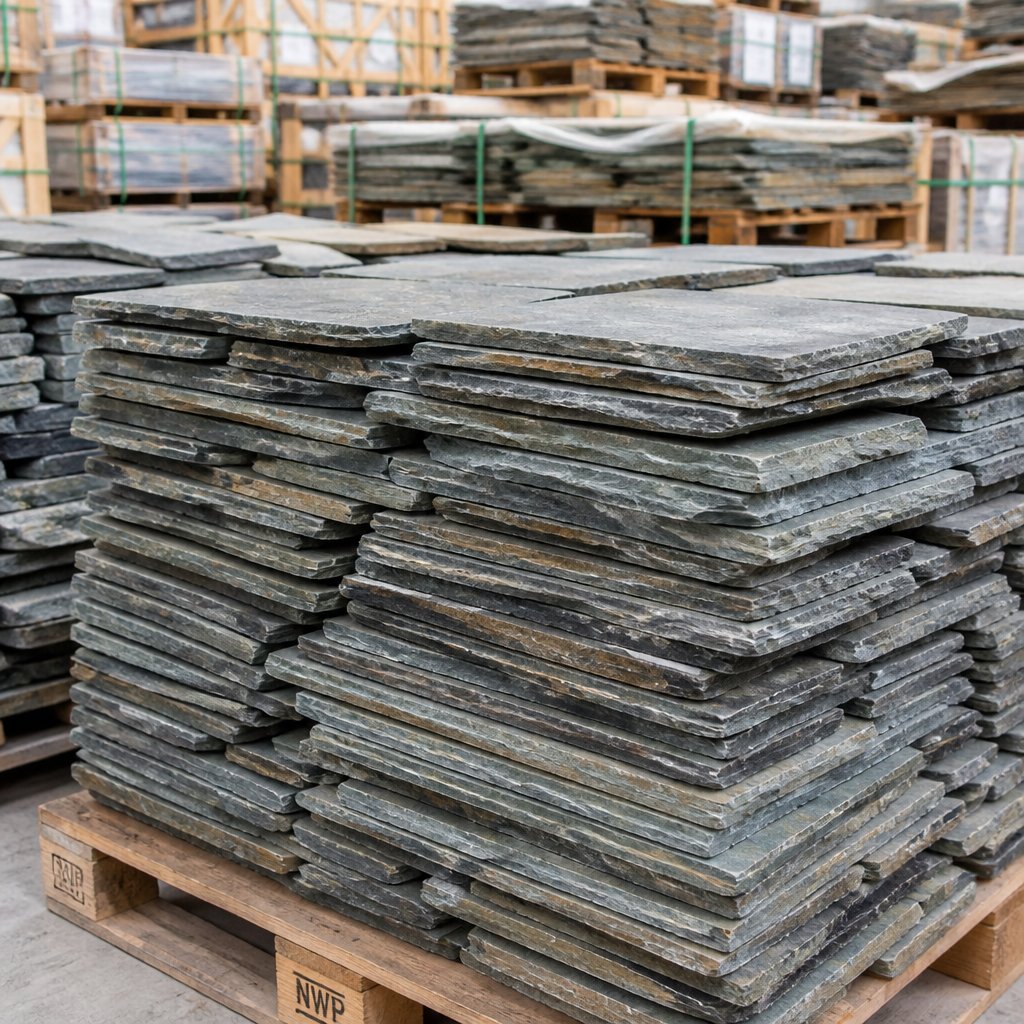
Reclaimed Slate Roofing provides authentic, reclaimed slate that delivers proven durability and historic character. Every piece is inspected, cleaned, and ready for installation, helping builders and restorers maintain architectural authenticity and modern reliability.
This article explains how to plan, prepare, and execute a professional slate roofing installation. You’ll learn the essential tools, techniques, and details that protect your investment and enhance your project’s longevity through proper material selection and skilled application.
Understanding Slate Roofing
Slate roofing has distinct types, clear benefits, and some important drawbacks to consider. Knowing these details helps you choose the right materials and plan your installation effectively.
Types of Slate Roofing Materials
Slate comes in several types based on color, thickness, and origin. Natural slate is the most common and prized for its durability. Varieties include black, gray, green, purple, and red slate. The color depends on the minerals in the stone.
You’ll find both new quarried slate and reclaimed slate. Reclaimed slate offers historic character and proven longevity. Thickness matters, typically ranging from 1/4 inch to 1/2 inch. Thicker slates last longer but are heavier and cost more.
Slate sizes vary too, from 8x8 inches to larger 18x24 inch pieces. You'll select sizes based on your roof's slope and design. Proper slate quality ensures durability and resistance to weather.
Benefits of Slate Roofing
Slate roofs are highly durable; many last over 100 years if installed correctly. This longevity reduces the need for frequent repairs or replacements. They resist fire, water, and harsh weather better than many other roofing materials.
Slate also improves a home’s value and curb appeal with its timeless look. Using reclaimed slate reduces waste and supports sustainability, as you reuse quality materials from past projects. We specialize in providing these authentic materials, tested for strength and quality.
Slate roofs require minimal maintenance and keep homes well insulated, which helps reduce energy costs. They are also resistant to mold and insects, adding to their lifespan.
Drawbacks of Slate Roofing
Slate roofs are heavy; your roof structure needs to support the extra weight. This may require additional reinforcement, adding to installation costs. Installation is labor-intensive and requires skilled installers familiar with slate's requirements. Mistakes can cause damage or leaks.
Slate is more expensive upfront compared to asphalt or metal roofing. Although it lasts longer, your initial investment will be higher.
Repairs can be tricky because matching slate colors and sizes, especially with reclaimed slate, can be a challenge. You need access to a trusted supplier to ensure authenticity and availability of matching pieces.
Preparation for Slate Roofing Installation
Before installing slate roofing, you need to ensure your roof structure can support the weight, gather the right tools and safety gear, and calculate materials and costs accurately.
Evaluating Roof Structure Suitability
Slate is heavy—often 800 to 1,500 pounds per square (100 square feet). Your roof framing must support this extra load safely. Start by inspecting your roof deck and rafters. Wood or metal framing should be strong and in good condition.
Reinforce weak areas with additional joists or cross-bracing as needed. Make sure the roof slope is appropriate.
A minimum pitch of 4:12 (4 inches of rise for every 12 inches of run) is typical for slate to shed water properly. If you’re unsure about structural capacity, consult a structural engineer.
Required Tools and Safety Equipment
You need specialized tools for slate roof installation:
- Slate cutters or guillotines for clean cuts
- Slate rippers to remove broken tiles
- Roofing hammers with a sharp blade for nail setting
- Chalk lines for straight rows
- Nail guns or stainless steel nails (common size: 1-1/2 to 2 inches)
Safety gear is critical. Use a sturdy harness, hard hat, gloves, and non-slip boots. A secure scaffold or ladder system is necessary to prevent falls. Organize your tools in advance. Having everything ready reduces downtime and potential installation errors.
Estimating Costs and Materials
Calculate how many slates you need based on roof area and slate size. Slate tiles vary but typically measure about 12x8 inches. Account for 4 to 6 slates per square foot. Include extra slates for cuts, waste, and future repairs—usually 10-15% more than the measured area.
Materials include underlayment, nails, flashing, and sometimes battens. High-quality underlayment protects the deck and improves roof longevity. Slate roofing is an investment. Factor in labor, materials, and possible structural upgrades when budgeting.
Our team offers builder-direct pricing, helping control costs while ensuring you get authentic, durable material for your project.
Slate Roofing Installation Process
Installing a slate roof requires careful steps starting with preparing the roof surface and applying a reliable underlayment. Planning the slate layout is essential to maintain consistent rows and proper overlap. Cutting and fitting the slates correctly ensures a secure, durable roof.
Surface Preparation
Before installing slate, you must inspect and repair the roof deck. It should be solid, flat, and free of damage or rot. Use plywood or board sheathing that meets local building codes. The deck must support the heavy weight of slate tiles, roughly 800 to 1500 pounds per square.
Check the roof slope—slate performs best on slopes greater than 4:12. Lower slopes require longer overlaps to prevent leaks. Remove old roofing layers if any, then install drip edges and flashing around chimneys and valleys to direct water off the roof.
Underlayment Application
A waterproof underlayment protects the decking beneath the slate. Use a slate-specific synthetic membrane or multiple layers of roofing felt. Install the underlayment carefully to cover the entire roof surface, overlapping seams by at least 6 inches.
Secure the underlayment with roofing nails to avoid wrinkles or buckling. Extend it over the eaves and rake edges. This layer acts as a secondary barrier if water penetrates the slates.
A proper underlayment also helps prevent wind-driven rain from reaching the deck.
Slate Tile Layout Planning
Accurate layout ensures the roof looks uniform and performs well. Start by measuring roof width and calculating the number of slate courses needed. Begin at the eave with starter courses that extend beyond the roof edge for proper water shedding.
Mark chalk lines horizontally for each slate row and vertically for consistent spacing. Slate tiles typically overlap about 3 inches (headlap) depending on roof slope. Planning this overlap is key to preventing leaks, especially on low-slope roofs.
Use reclaimed materials for authentic, durable slates. Select tiles with consistent size and thickness to simplify layout and maintain even coverage.
Slate Tile Cutting and Fitting
Cutting slate requires sharp tools like a slate cutter or a scoring knife. Score the slate where needed, then snap along the line to achieve clean edges.
Trim tiles for joints around hips, valleys, chimneys, and vents. Lay tiles starting from the bottom edge, securing each with two copper or stainless steel nails near the top edge to allow for natural expansion.
Avoid nails that can rust or slip, which leads to leaks. Carefully fit cut tiles to avoid gaps and maintain headlap. Use hook fasteners in tricky areas where nailing isn’t possible. Proper cutting and fitting extend the roof's life and maintain its authentic appearance.
Nailing and Fastening Techniques
Proper nailing is key to securing slate tiles and ensuring your roof lasts. Using the right fasteners and placing them correctly prevents damage and keeps the slates firmly in place under all weather conditions.
Choosing the Right Fasteners
Use copper or stainless steel nails to avoid rust and corrosion. These materials hold up well over time and are strong enough for slate roofing. Hot-dipped galvanized nails are an alternative but less durable with reclaimed materials. Nail length depends on the slate thickness and roof deck.
Avoid standard roofing nails with coatings that wear off. Smooth-shank nails help prevent cracking or splitting the slates when driven in.
Nailing Patterns and Placement
Start by nailing near the slate’s top edge, about 6 inches from the bottom (butt) and ¾ inch from the side edge. Two nails per piece are standard for single-width tiles. Place nails straight and flush to avoid cracks. If the nails go in at an angle or are hammered too hard, slates could break.
On roofs with a slope less than 6:12, slate hooks may be better for repairs, but nails are most common on new installations.
Use steady pressure when fastening. The goal is secure attachment without damaging the stone. Proper nailing patterns with quality fasteners mean your slate roof will keep its authentic look and function for decades.
Flashing and Waterproofing
Proper flashing and waterproofing are critical to keep your slate roof watertight. Paying close attention to flashing around vulnerable areas like chimneys, valleys, ridges, and hips will prevent leaks and extend the life of your installation.
Chimney and Valley Flashing
When working around chimneys, your flashing must form a tight seal between the slate roof and chimney base. Use metal flashing bent to shape, installing step flashing under each row of slates along the chimney sides.
This directs water away efficiently. Valleys are especially prone to water buildup. Use a continuous metal valley flashing beneath the slates, ensuring it’s properly fastened but allows for slight movement.
Overlapping the slates over the flashing by at least 2 inches helps shed water. Check all seams for secure joints and use sealant sparingly to reinforce water barriers without blocking slate expansion. Proper chimney and valley flashing are essential to avoid costly water damage.
Ridge Cap and Hip Installation
Ridges and hips require special attention since they meet at angles exposed to rain and wind. Install a metal ridge cap flashing under the slate ridge pieces to form a waterproof barrier. Lay the slate pieces on hips and ridges with a slight overlap to ensure water flows off smoothly.
Overlap should be at least 2 inches for protection. Secure the ridge slates with copper nails or hooks to resist strong winds. Ensure the flashing is continuous along the entire ridge or hip, with sealed joints to prevent water infiltration.
These steps protect critical roof seams, preserving the durability and appearance of your slate roof. Our materials are vetted for durability, allowing you to trust their performance with these detailed flashing techniques.
Finishing the Slate Roof
Completing your slate roof means focusing on accuracy and protection. You need to check each slate’s position for even spacing and alignment. Then, clean the surface carefully and apply any necessary sealants to keep the roof durable and weather-resistant.
Inspecting for Proper Alignment
Look closely at the slates to ensure each row lines up evenly. Slates should not be pressed tightly together; leave a small gap of about 1/16” to 1/8” to allow for expansion.
This spacing is crucial to prevent cracking and water pooling. Check that the edges, or verges, are neat and that the starter course at the eave sits on the cant strip, which keeps the first rows at the right angle.
Misaligned tiles can cause leaks and reduce the lifespan of your roof. Use a straight edge or laser level to verify horizontal rows. Correct any uneven slates immediately before moving on. Accurate placement protects your roof and preserves the historic character of reclaimed materials.
Cleaning and Sealing Slate Tiles
After installation, remove all debris like broken slates, nails, and dust from the roof surface. Use a soft brush or low-pressure air to avoid scratching the tiles. Clean slate improves the roof’s appearance and prevents dirt buildup that could cause damage.
Some projects may benefit from applying a penetrating sealant. This adds a water-resistant layer without altering the slate’s natural look. Sealants keep moisture out and help prevent moss or algae growth.
Before sealing, confirm the slates are dry and free of dust. If you use sealants, choose one designed specifically for natural slate. Trusted companies offer fully vetted, clean tiles ready for installation and sealing, ensuring your roof lasts with authentic materials.
Maintenance and Longevity of Slate Roofs
Maintaining a slate roof ensures it lasts for decades, protecting your investment while preserving its authentic beauty. Regular checks help spot issues early, and timely repairs prevent costly damage.
Routine Inspection Tips
Inspect your slate roof at least twice a year, ideally in spring and fall. Look for broken, cracked, or missing slate tiles. Check around chimneys, vents, and valleys where damage often happens first. Pay close attention to the flashing and gutter areas.
Damaged flashing or clogged gutters can cause water buildup, leading to leaks or slate deterioration. Use binoculars for a safe, close-up view from the ground. If you need to get on the roof, wear soft-soled shoes to avoid damaging the tiles. Document any issues so you can track changes over time.
Repairing Damaged Slate Tiles
When you find damaged tiles, act quickly to stop water from seeping in. Replace broken or missing slates with matching reclaimed tiles for durability and authentic look. Trusted suppliers provide vetted, historic slate ready for precise repairs.
Use copper or stainless steel nails to resist rust. Avoid plastic materials that may fail over time. Skilled installers can remove damaged tiles carefully without disturbing surrounding ones. Sealing cracks or small gaps isn’t a permanent fix.
Replacing damaged slates keeps your roof strong and prevents larger problems. Proper repairs extend the life of your slate roof by decades.
Environmental Impact and Sustainability
Choosing slate roofing affects more than just your home's look. It influences how long your roof lasts and what happens when it’s time to replace or recycle materials. Understanding the full environmental impact helps you make smarter, more durable choices.
Lifecycle of Slate Roofs
Slate roofs are known for their durability, often lasting over 100 years. This longevity means you'll replace your roof far less often compared to other materials. The natural stone used in slate roofs has a low embodied carbon footprint.
Its production requires less energy than manufacturing synthetic or metal roofing materials. Because slate is so long-lasting, it often outlives the building it covers. This lowers the total environmental cost across the roof’s lifecycle.
By choosing genuine reclaimed slate from reliable suppliers, you further extend the life of existing materials. This reduces the demand for new quarrying and cuts down on environmental impacts related to extraction and transport.
Recycling and Disposal
When a slate roof finally reaches the end of its use, it can be recycled or reused instead of sent to a landfill. Slate is fully natural and can be repurposed as roofing material, landscaping stone, or ground into aggregate for construction.
Proper disposal matters because typical roofing materials generate tons of landfill waste every year. Recycling slate helps reduce this waste stream significantly.
If you work with a reputable company, you get access to carefully reclaimed slate that is inspected and prepped for reuse. This process preserves historic materials and supports sustainable building practices by minimizing waste and environmental harm.
Choosing a Professional Slate Roofer
Finding the right roofer impacts the quality and lifespan of your slate roof. Focus on clear trade experience, proper licensing, and a track record of successful slate installations. Asking the right questions will help you assess reliability and expertise.
Qualities to Look For
Look for roofers with extensive experience specifically in slate roofing. Slate is heavy and fragile, so contractors must know how to handle, cut, and install it properly. Verify that they have the correct licenses and insurance to protect you from liability.
Check for specialists who offer warranties on their work. Longevity and attention to detail are key, especially when working with authentic or reclaimed slate. Choosing a roofer familiar with historic materials ensures they understand the nuances of your project.
Strong project management skills matter. A reliable slate roofer will deliver on time and communicate clearly about scheduling, costs, and any issues.
Questions to Ask Before Hiring
Start by asking how many slate roofs they have installed in the past year. You want proof of recent, active experience, not just historical expertise. Inquire about the type of slate they prefer and source. Using authentic slate adds value and durability.
Ask for references or photos of past jobs. Confirm if they handle both installation and maintenance or if they subcontract. Knowing their approach to underlayment, flashing, and ventilation helps you gauge their technical skill.
Ask for a written estimate detailing costs, timelines, and materials. This reduces surprises and sets clear expectations. Confirm whether they handle permits and inspections for your area to keep your project compliant.
Ensure Enduring Strength With Skilled Slate Installation
Installing slate roofing requires precision, balance, and respect for traditional methods. A properly fitted slate roof resists weather, time, and structural stress for decades. Every stage—from inspection and underlayment to flashing and fastening—defines how well your roof performs.
Reclaimed Slate Roofing provides authentic, reclaimed slate that has already proven its durability. Each tile is cleaned, inspected, and ready for installation, allowing builders and architects to achieve both authenticity and efficiency.
For expert guidance and genuine reclaimed materials, call us and request a quote or schedule nationwide delivery today.
Frequently Asked Questions
Installing a slate roof requires careful planning, proper materials, and skilled labor. Costs vary based on slate type and roof size. Installation involves several precise steps and specific construction details. Maintenance is needed to protect your investment over time.
What are the average costs associated with installing a slate roof?
Slate roofing typically costs between $15 and $30 per square foot. The price depends on the quality and type of slate, labor rates, and roof complexity. Reclaimed slate may offer cost savings while providing authentic materials.
What are the key steps in the process of installing slate roofing?
First, prepare the roof deck by securing clean, dry wood. Next, install underlayment to protect against moisture. Lay the slates starting from the bottom edge, overlapping each row. Use copper or stainless steel nails to fasten slates firmly.
How does the installation of synthetic slate differ from natural slate?
Synthetic slate is lighter and easier to cut and handle. It usually requires different fasteners and sometimes special underlayment. Natural slate is heavier, brittle, and needs more precise nailing and spacing to prevent breakage.
What detailed construction aspects must be considered during the installation of a slate roof?
Ensure the roof structure supports the heavy weight of slate. Use corrosion-resistant nails like copper or stainless steel. Check for wood decay before installation. Valleys, flashings, and gutters must be detailed precisely to avoid leaks.
Can homeowners install slate roofing themselves, and if so, what expertise is required?
Slate roofing installation is complex. You need roofing experience, knowledge of slate handling, and proper tools. Mistakes can cause costly damage. Hiring professionals or consulting experts is generally recommended.
What are the long-term maintenance requirements after installing a slate roof?
Regular inspections each year are needed to spot damaged or missing slates. Clean debris to avoid water buildup. Fix broken slates promptly using matching reclaimed materials to maintain durability and appearance.
Reclaimed Slate Roofing offers authentic slate materials that are fully inspected and ready for your next roofing project. Using their materials supports quality and sustainability in your installation.