Reclaimed slate should install cleanly and perform over the long term. Start by checking each piece for cracks, delamination, and thickness consistency. Keep only sound tiles and sort them by size, color, and gauge before installation. This upfront step reduces delays and keeps coursing consistent once work begins.
Preparation should be handled in a dry, controlled area. Clean off moss, remove old nails, and clear any remaining mortar without damaging edges or surface texture. Organize tiles into consistent groups so crews can move efficiently during installation.
Reclaimed Slate Roofing supplies reclaimed slate that is already inspected, cleaned, and sorted for reuse. This reduces prep time on site and helps ensure materials arrive ready for a straightforward installation process.
Reclaimed Slate
Reclaimed slate comes from old buildings—it’s inspected, cleaned, and sorted before it’s reused. So what’s the appeal? You’ll find out what it is, why builders go for it, and where it usually ends up.
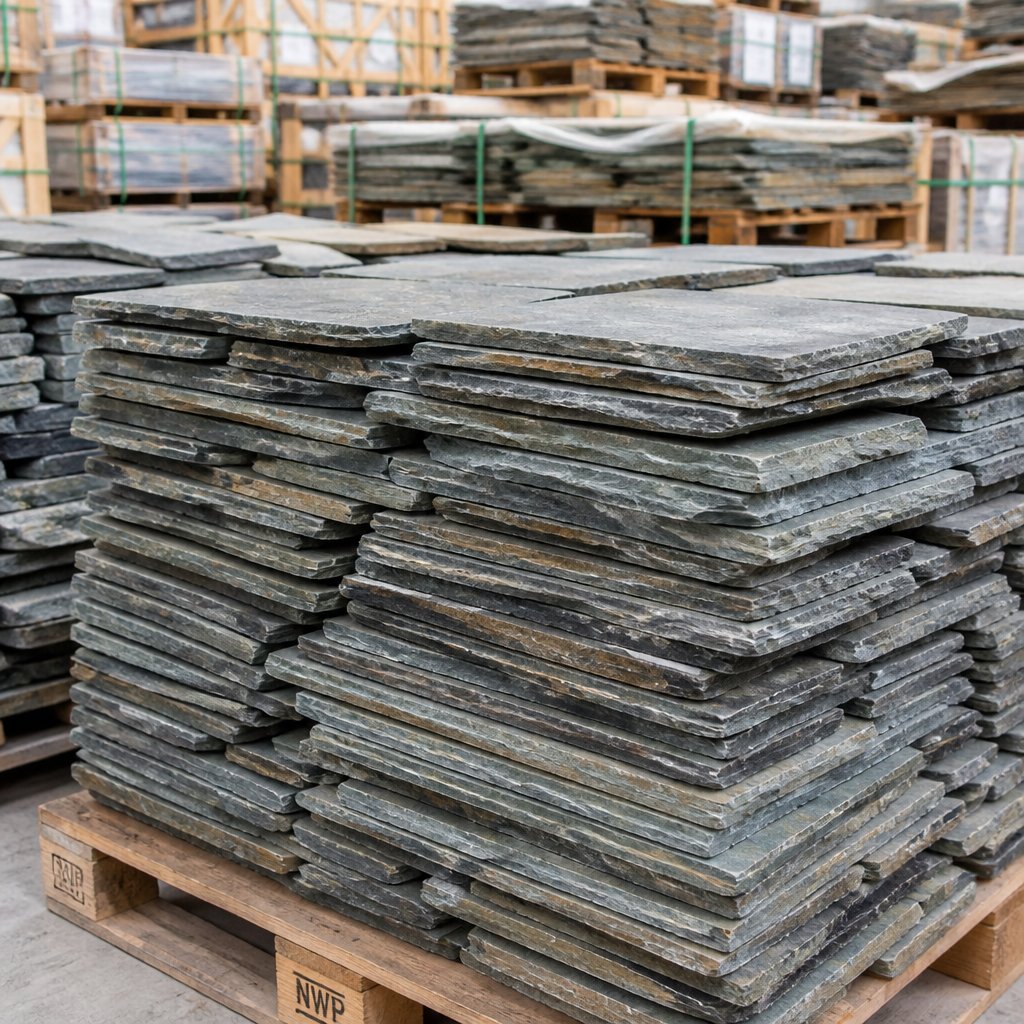
Reclaimed slate is natural roofing slate pulled off historic or older roofs. Each piece keeps its original thickness, color, and texture, so you get a material that’s already proven itself against the weather.
People check each piece by hand for cracks, nail holes, and overall soundness. Suppliers sort usable tiles by grade and size. Expect some color variation and edge wear—it’s just part of the slate’s charm and something you’ll want to plan for during installation.
Benefits of Using Reclaimed Slate
Reclaimed slate lasts because it’s already survived decades (or centuries) of exposure. That takes a lot of guesswork out compared to cheap synthetic stuff.
You’re cutting down on waste and saving on embodied carbon by reusing what’s already out there. Reclaimed pieces usually match historic colors better than new quarried slate. For resale or preservation projects, authentic slate can really boost property value and help meet preservation standards.
Common Applications for Reclaimed Slate
Reclaimed slate works well for full roof replacements on period homes—Victorian, Colonial, you name it—anywhere matching the old material matters. It’s great for accent spots too, like dormers or porches, where you really want that historic look.
Contractors use reclaimed slate for patch repairs to keep things looking seamless. Architects sometimes pick it for high-end custom homes, aiming for that weathered, real-deal style while trusting in its durability. Reclaimed Slate Roofing keeps a vetted inventory ready for both repairs and full-roof projects.
Inspecting Slate for Installation
You’ve got to check each tile for soundness, size, and fit before it goes on the roof. Do this at ground level if you can, then re-check on a clean, flat workbench.
Evaluating Slate Condition
Look for hairline cracks, delamination, and chips—those weaken the tile. Hold each piece up to the light; thin, see-through lines usually mean fractures that’ll get worse once you start nailing. Tap questionable tiles with a wooden block—a clear ring means it’s solid, but a dull thud? That’s trouble inside.
Sort by thickness and flexibility. Thicker, sturdier slate is better for valleys and ridges. Mark or bag any pieces with borderline flaws for low-stress spots or scrap. Keep track of how many prime and secondary pieces you have so you can order right.
Identifying Usable Pieces
Measure each slate’s face size and thickness to match your roof’s pattern. Group the same sizes together for even courses. Save special shapes—hips, wedges, headers—for their proper places so you don’t end up cutting up good tiles on the roof.
Grade pieces as A (full install), B (repair or low-stress), or C (discard or decorative). Quick checklist: no cracks, right thickness, straight riven edge, proper nail holes. Label pallets clearly—it’ll save you from mistakes once you’re up the ladder. Reclaimed Slate Roofing sorts and inspects material this way, which really helps on the jobsite.
Safety Considerations
Wear cut-resistant gloves and eye protection when you’re handling and sorting slate. The fragments can be sharp and heavy. For big pallets, lift with a partner to avoid dropping tiles or hurting your back. Keep a first-aid kit nearby and use a rigid container for broken pieces so nobody gets poked.
Inspect on a flat, stable surface and don’t stack tiles too high. Use a wet broom or HEPA vacuum to keep dust down and reduce silica exposure. If you’re working indoors, wear a respirator rated for fine dust when you’re cutting or trimming reclaimed slate.
Cleaning Reclaimed Slate
Clean slate helps pieces sit flat, match better, and resist moisture. You’ll want to get rid of loose dirt, break up moss, and use the right tools so your slate stays tough and authentic.
Removing Dirt and Debris
Lay the slate flat on a workbench or clean ground. Use a soft-bristle brush or broom to sweep off dust, grit, and old mortar flakes. Don’t forget the edges—junk stuck there can keep tiles from overlapping tight.
If dirt won’t budge, rinse with low-pressure water (garden hose, not a pressure washer). Hold the slate at an angle so water runs off fast—don’t let it soak. Let each piece dry flat before stacking so you don’t get stains or mold.
Check for hidden nails, leftover flashing, or old mortar. Pull out metal with pliers and use a wooden or plastic scraper for chips—metal tools can crack the slate.
Addressing Stains and Moss
Start by scraping off moss and lichen with a plastic scraper or stiff nylon brush. Go with the grain to avoid flaking thin edges.
For organic stains, use a diluted bleach solution (one part bleach to four parts water) or a biocide labeled for this. Spray it on, wait 10–15 minutes, then rinse well with low-pressure water. Gloves and eye protection are a must, and watch out for runoff near plants.
For mineral stains or tar, try a paste of baking soda and water or a mild stone cleaner. Put it on, let it dry, then brush off and rinse. Always test a cleaner on a hidden piece to make sure it won’t mess with the color or texture.
Cleaning Tools and Materials
You’ll want: soft-bristle brushes, nylon scrapers, a garden hose with spray nozzle, pump sprayer, rubber gloves, safety glasses, and sturdy work gloves. Bring a plastic tub or crate for soaking small pieces if you need to.
Recommended cleaners: diluted bleach for moss, mild stone cleaner for mineral stains, baking soda for spot cleaning. Skip acid-based cleaners, strong solvents, and pressure washers above 500 psi—they’ll strip the surface or crack thin slate.
Keep a labeled kit handy: spare brushes, rags, small bucket, and maybe a moisture meter if you want to check dryness before install. If you buy slate from Reclaimed Slate Roofing, it usually just needs a quick touch-up.
Sorting and Organizing Slate Tiles
Sort tiles so the crew can work quick and avoid breakage. Organize by size, thickness, color, and texture before you load them up for the jobsite.
Sorting by Size and Thickness
Measure each tile and label stacks by their actual size (12"x6", 14"x8", whatever you’ve got). Keep same-length tiles together so you can lay even courses without cutting up too many.
Check thickness with a caliper or just a simple gauge. Mark out thin, medium, and thick stacks. Thin tiles need gentler handling and different nailing. Thick ones can handle more, but remember the extra weight for your roof structure.
Make pallets or bins with clear labels and photos of tile faces. Use some non-slip padding between layers and don’t stack too high—nobody wants crushed tiles. Keep a checklist so you know exactly how many of each size make it to the roof.
Grouping by Color and Texture
Visually match tiles ahead of time to get a balanced look. Lay out samples and snap a few photos of mixes you like for reference during install.
Separate the heavily weathered, lightly weathered, and uniform tiles. Use the most uniform pieces where you want crisp lines, and blend the variegated ones across bigger areas.
Label each group with a short code (W1 for weathered dark, L2 for light blue-gray, etc.) and keep a small reference board on site. It’ll help your crew keep things consistent across valleys and ridges.
Reclaimed Slate Roofing sorts tiles before shipping, but always double-check groupings when they arrive so they fit your job’s look and needs.
Repairing and Prepping Slate Surfaces
Check every slate for structure, size, and surface. Match thickness and color, pull old nails, and handle any repairs before you start installing.
Repairing Chips and Cracks
You can fix small chips and hairline cracks with epoxy made for stone. Mix up a two-part epoxy, fill the damaged spot, and smooth it with a putty knife. Once it’s cured, sand lightly to blend. Add a color tint if you want to match the slate.
If a slate’s got a through-crack or a big break, just replace it. Don’t try to patch major fractures—they’ll probably fail. Keep a stash of reclaimed pieces sorted by size and thickness so you can swap in matches fast.
Wear eye protection and gloves when grinding or sanding. Wipe dust from the repair area before sealing so your fix actually sticks.
Trimming to Size
Cutting reclaimed slate takes the right tools: a diamond blade wet saw for straight cuts, or a carbide-sand scoring tool for small trims. Mark your lines with pencil or chalk, clamp the slate flat, and make shallow passes with a wet saw to avoid chipping. Let water cool the blade and keep dust down.
For keyhole or hook cuts, use a slate cutter or hammer to split along the scored lines. Test-fit trimmed pieces dry before fastening. Try to keep edge gaps within 1–2 mm for a tight, weatherproof fit.
Sort trimmed pieces by final dimension and label them for each roof elevation—it’ll make install way faster.
Pre-Sealing Slate
Only pre-seal if the job calls for it or if slates show porous weathering. Use a breathable, silane-siloxane sealer that keeps water out but lets vapor through. Apply two thin coats with a low-pressure sprayer or soft brush, following the manufacturer’s coverage rates.
Test the sealer on a hidden piece to check for color change. Let each coat cure before handling. Avoid silicone-based stuff that traps moisture and can cause delamination.
Store sealed slates flat on pallets with spacers underneath for airflow. Label sealed batches and note the cure date so you use the oldest first.
Storing Prepared Slate
Keep bundles dry, level, and off the ground. Protect them from breakage and moisture until you’re ready to install.
Best Storage Practices
Store slate on pallets or treated timbers at least 4 inches off the ground. Put pallets on flat, compacted surfaces so they don’t shift or tilt. Stack bundles flat—heaviest on the bottom, lighter on top.
Cover stacks with breathable tarps or corrugated panels to shed water but let air flow. Seal the edges with bungees or straps so wind doesn’t blow covers off. Mark stacks by grade, size, and color for quick selection on the roof.
If you’re storing long-term, rotate your stock every few months. Move the oldest pieces to the top so you use them first. If you buy from Reclaimed Slate Roofing, check that inspection marks are still visible.
Avoiding Damage Before Installation
For any bundle over 50 pounds, use two people to lift. Grab from the ends, not the flat face, to avoid cracks. Use soft slings or foam padding when moving with forklifts or lifts.
Keep slate away from sharp impacts and heavy foot traffic. Don’t store under scaffolding—falling tools can chip edges. If you spot chipped tiles, sort them into a repair batch and label them.
Check stacks weekly for moisture, mold, or freeze damage. Swap out wet covers fast and let damp pieces dry before install so you don’t run into blistering or mortar bond issues.
Gathering Installation Materials
Start by listing the slate you’ll need. Count full and replacement slates, then tack on an extra 5–10% for breakage and cutting—trust me, it happens. If you ordered from Reclaimed Slate Roofing, grab the inventory sheet and check it against what’s actually on the truck before unloading.
Next, round up underlayment and deck materials. Go for a high-quality underlayment rated for slate weight and weather exposure. Take a good look at the roof deck; if you spot any rot or weak boards, swap them out before rolling the underlayment.
Collect flashing, ridge pieces, and fasteners. Copper or stainless steel flashing lasts the longest, so don’t skimp here. Same goes for nails—copper or stainless, sized for slate. Skip common steel nails if you want to avoid rust headaches down the road.
Gather your tools and safety gear. You’ll want a slate ripper (or two), slate cutter or grinder, chalk lines, tape measure, and levels. Don’t forget fall protection, gloves, safety glasses, and either scaffolding or sturdy ladders.
Set up your staging and handling aids. Pallets, soft straps, and some plywood will help prevent chipping when you’re moving slate around. Store slates flat and dry—if rain’s in the forecast, cover them up.
Label and separate slates by grade and color. Sorting now keeps your courses even and the roof looking sharp. Mark anything special, like cuts or ridge pieces, so you’re not hunting for them later.
Final Preparation Tips Before Installation
Check slate for chips, consistent thickness, and matching color batches. Keep the pieces dry and sorted by course height—you’ll move faster that way.
Acclimating Slate to Environment
Get the slate on site at least 48 hours before you start. Store it on pallets, off the ground, and cover with a breathable tarp or stash it in a ventilated shed so moisture doesn’t get trapped.
Stack slates by thickness and how they look. Label stacks with course height and the date you brought them in. That way, everyone can pull the right pieces for each row.
If temps are dropping below freezing, bring slate inside for a few hours before installation. Cold slate is brittle and cracks easily when you drive fasteners—letting it warm up a bit can save you a lot of grief.
Keep reclaimed pieces away from new ones. For orders from Reclaimed Slate Roofing, double-check that the lot numbers match your delivery paperwork before you get started.
Dry-Fitting for Layout
Lay out a sample area on the ground or on a mock-up section to test your coursing and exposure. Mark starter rows and ridge transitions with chalk or tape.
Check how each slate sits next to its neighbors. Reclaimed pieces have quirks—rotate them to hide odd edges and keep your sightlines straight.
Measure and mark nail spots on a few sample slates. Make sure nails will clear slate beds and centers, and won’t split thinner pieces.
Dry-fit valleys, hips, and dormers first. Those spots usually need the most tweaking and will set the tone for the rest of the layout.
Double-Checking Measurements
Re-measure roof runs, eaves, and ridges before you cut or nail anything. Use a laser or a long tape and write down three measurements for each span.
Figure out your courses from eave to ridge so you don’t end up with a skinny top course. Adjust the starter course exposure or slate size if needed—keep the top course at least a full slate high.
Confirm flashing sizes and nailer locations. Make sure underlayment laps and flashing clearances work with local code and your chosen slate exposure.
Cross-check your quantities against the sorted stacks. Count how many pieces you’ve got for each course, plus spares, so you don’t get caught short halfway through.
Proper preparation is what makes reclaimed slate perform. When tiles are inspected, cleaned, sorted, and staged correctly, installation moves faster and with fewer issues. Consistent sizing, clear grouping, and dry storage all contribute to a roof that looks right and holds up over time.
Attention to detail at the prep stage reduces waste and prevents rework. Crews spend less time adjusting mismatched pieces and more time installing. That efficiency carries through the entire project, from first course to final ridge.
Reclaimed Slate Roofing supplies reclaimed slate that is already inspected, cleaned, and sorted for reuse. This minimizes on-site prep and provides consistent material ready for installation.
With the right process and properly prepared materials, reclaimed slate becomes a reliable, long-term roofing solution that delivers both performance and authentic character.
Frequently Asked Questions
Here’s a rundown on how to inspect, clean, prep, and get started with reclaimed slate—plus a few tips on sealing, adhesives, and underlayment.
What's the proper technique for prepping old slate tiles for a new installation?
Look over each tile for cracks, delamination, and busted hooks or nail holes. Sort by size and thickness so matching them on the roof is easier.
Pull out old nails and mortar gently with a pry bar and comb. Don’t force brittle pieces—just toss any that split or flake.
Replace missing nail hooks with stainless or copper ones. Test-fit tiles on a flat surface to check for consistent thickness before hauling them up.
Can you guide me on the best practices to start laying a slate roof?
Snap a straight eave and ridge chalk line to keep things even. Start at the low point and work across, keeping your headlap and side lap consistent.
Use stainless or copper nails, long enough to go through the slate and into the deck by at least 3/4 inch. Keep fasteners vertical and centered in factory holes if they’re there.
Stagger joints and line up widths to avoid weak, thin edges. Cut tiles with a slate cutter or angle grinder (diamond blade works best), and always wear eye and hand protection.
How should slate tiles be sealed before being installed?
Most natural slate doesn’t need a surface seal. Don’t use paints or coatings that trap moisture or mess with breathability.
If you spot efflorescence or biological growth, use a mild, masonry-safe cleaner and rinse well. Only apply a breathable silane/siloxane water repellent if a testing lab or the manufacturer recommends it for your batch.
What's the ideal way to clean reclaimed slate before setting it up?
Dry-brush tiles with a stiff nylon brush to knock off loose dirt and mortar. For tougher spots, soak tiles in clean water and scrub—skip harsh acids, they’ll wreck the minerals.
A low-pressure washer is fine if you need it—keep pressure under 1,500 psi and hold the nozzle at least a foot away. Let tiles dry all the way before stacking or sealing.
Which adhesive should I use for securing slate tiles effectively?
Go with a polymer-modified cementitious mortar or a roofing-grade polyurethane adhesive for spots where nails aren’t allowed or for tricky details. Make sure the product’s rated for exterior use and plays nice with natural stone.
Always check the manufacturer’s instructions for open time, temperature, and cure time. Test a few reclaimed tiles first to make sure the bond and look are right.
Is an underlayment necessary when installing a slate roof?
Yeah, it really is. Go with a high-quality, slip-resistant underlayment rated for slate roofs—something like reinforced synthetic underlayment or felt with a synthetic top layer. Underlayment shields the deck from wind-driven rain and acts as a backup barrier if a tile ever fails.
If you’re in a cold climate, put ice-and-water shield at the eaves and valleys. Nail or adhere the underlayment according to the product’s specs, and don’t block ventilation paths under the slate.