Quality reclaimed slate is defined by consistency and durability. Look for solid pieces with tight layers, uniform thickness, and original cleft texture intact. Natural weathering is expected, but the slate should show stable color and no signs of structural weakness. These are the pieces that install cleanly and perform over the long term.
This guide covers how to identify structural issues, evaluate aging and surface condition, and confirm authenticity and provenance before you buy. It also outlines practical checks you can use on site, along with clear criteria for comparing reclaimed and new slate so you can make informed decisions without delays.
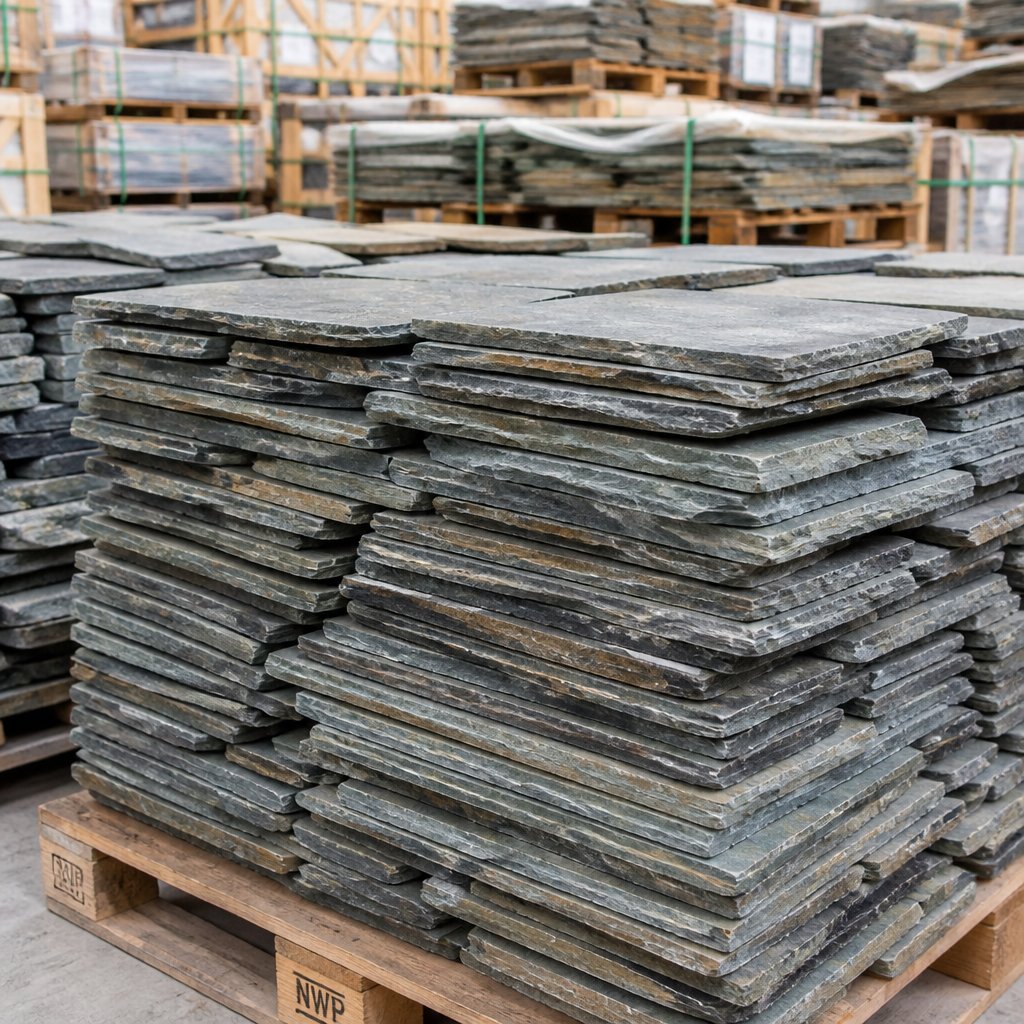
Reclaimed Slate Roofing supplies authentic reclaimed slate that is inspected, cleaned, and sorted for consistency. Each piece is vetted for performance and prepared for reuse, reducing the risk of defects and saving time during installation. With fast, jobsite delivery and builder-direct pricing, it provides a reliable source for projects that require verified historic materials.
Reclaimed Slate
Reclaimed slate is real, historic roofing material—long-lasting, unique in color, and marked by natural wear. Here’s what reclaimed slate actually is, why it matters for performance and sustainability, and where most of these pieces come from.
Reclaimed slate is pulled off roofs on older buildings. Each piece is natural stone, split by hand or machine decades or even centuries ago. You get original thicknesses, natural cleft surfaces, and those color tones that just fit historic work.
Inspectors grade reclaimed slate by size, thickness, and how sound it is. Look for pieces without deep cracks, heavy delamination, or root damage. Chips and patina? Totally normal—those add character, but shouldn’t mess with the slate’s structure.
Benefits of Reusing Slate
Reusing slate saves money on both material and landfill fees. Slate usually lasts 75–150 years, so when you reclaim it, you’re getting proven durability for your new roof.
You also keep those historic colors and textures that new quarried slate just can’t copy. Reclaimed material cuts down quarry demand and checks the box for green-building standards. Builders get rare sizes and antique finishes, which are great for restorations or custom projects.
Common Sources of Reclaimed Slate
Most reclaimed slate comes from old public buildings, churches, big homes, and industrial sites being renovated or torn down. Try to get consistent batches from the same roof to match color and thickness.
Dealers sort and grade tiles before selling. Ask about provenance, inspection reports, and whether the pieces were stored dry. Reclaimed Slate Roofing inspects and cleans every tile, ships by batch, and can help match materials for repairs or full replacements.
Key Quality Indicators
Look for clear signs of good material: consistent color, intact edges, and steady thickness. Check each piece for structural flaws, then make sure the surface texture fits your job—smooth for modern installs, naturally weathered for restorations.
Visual Inspection Basics
Hold each slate up to the light. Hunt for hairline cracks, deep fissures, or spots where layers are splitting. Small chips on the surface are normal with reclaimed stuff, but through-cracks or busted corners mean less usable yield.
Check color and pattern on a bunch of tiles. Try to match batches to your roof area; weirdly different tones can make ugly stripes. Watch out for mineral stains or rust marks near nail holes—those show past metal contact or water issues.
A flashlight and a loupe help for close-up work. Mark suspicious pieces and set them aside for another look. If you’re buying from a dealer, ask for a sample box you can check on-site.
Assessing Thickness and Size Consistency
Use calipers to measure thickness at the head, middle, and tail of each tile. Acceptable variation is normal, but try to keep it under 1/8 inch across a shipment for smoother installation.
Sort tiles by size, grouping them within 1/2-inch increments. Consistent size makes things easier and speeds up the job. Notice any warped or cupped pieces—they won’t lie flat and can cause leaks or uneven lines.
Count how many tiles fall outside your tolerances before you buy. Ask the supplier about grading standards and return policies. Reclaimed Slate Roofing inspects and grades every piece to help you estimate what’s actually usable.
Surface Texture Examination
Run your hand over several tiles. Feel for smooth, cleaved, or really weathered textures. Smooth or cleaved faces fit tight and shed water best. Heavily weathered surfaces add historic charm but might be thinner at the edges.
Look for pitting, spalling, or flakes that come off under light pressure. Those are signs of weakness and might get worse outdoors. Check for lichen or mortar residue that could hide flaws; cleaning a sample tile shows its true condition.
Inspect nail holes and fixing zones. Enlarged or cracked holes show past stress and could need reinforcement. For visible projects, pick tiles with a consistent face finish to match the roof’s look.
Evaluating Structural Integrity
Check each slate for hidden faults and real strength before you buy. Focus on visible cracks, layer separation, and how the piece reacts to a bit of pressure to judge if it’ll last on a roof.
Testing for Cracks and Delamination
Look at every tile in daylight. Hold slabs up to the light and search for hairline cracks running from edge to center, and cloudy lines between layers. Tap tiles gently with a coin; a clear ring usually means the slate’s solid, while a dull thud can mean internal fractures or delamination.
Run your fingernail along the edges to feel for flaking or loose layers. Pay close attention to nail-hole areas and corners—these take the most stress during installation. Reject pieces with obvious splitting or active layer separation; they’ll fail early once nailed and exposed to weather.
Checking Strength and Durability
Try a simple bending test on a small sample. Support the slate at two points and press gently in the middle. Slate that bends a little and returns to shape is better than stuff that cracks or shatters with just a bit of pressure.
Weigh samples and compare them to the expected density for slate from that region—super lightweight pieces often mean too much weathering. Also, check for frost resistance by asking about provenance or past service life; slate that lasted decades on a roof usually still has strength. If you’re sourcing from Reclaimed Slate Roofing, ask about their inspection notes and any load or freeze-thaw testing.
Assessing Weathering and Aging
Check slate for surface wear, color changes, and water marks. Focus on cracks, edge loss, uneven patina, and stains that might mean past leaks or biological growth.
Identifying Signs of Excessive Wear
Look for split edges, flaking, and surface delamination. Tap questionable pieces—if they sound dull or hollow, the slate might have internal fractures or lost density.
Inspect corners and nail holes closely. Too much chipping means the tile’s been walked on or mishandled and might not survive reinstallation.
Measure thickness against a solid sample. Thinner, uneven pieces wear out faster and are harder to secure.
Take a quick count of broken pieces versus whole tiles. Lots of breakage means higher replacement and sorting costs during install.
Evaluating Color Fading and Patina
Line up tiles from different pallets in daylight to spot uneven fading. Real slate shows layered tones; if it’s all bleached out or powdery, that’s usually UV or chemical damage.
Patina can be nice if it’s even and keeps the grain. But abrupt color shifts with flaking or surface loss mean structural aging, not just character.
Match faded pieces to your roof’s existing slate. If too many tiles look off, you might need to blend with trim or reserve pieces to avoid a patchy look.
Note the original finish type (cleft, honed, or sawn). Fading hits finishes differently and changes how tiles reflect light once installed.
Detecting Water Damage or Staining
Look for dark rings, mineral streaks, or white efflorescence on both sides. Brown or rust stains near nail holes often mean corroded fasteners or past standing water.
Check for soggy or softened backing on tiles from clay or composite roofs. Slate that’s soaked up moisture can delaminate after freeze-thaw cycles.
Smell the bundles—musty or moldy odors mean long-term moisture and maybe biological growth.
Document any water stains and where you find them. Stains along edges, channels, or valley cuts often mean past roof leaks that could have affected a bunch of pieces.
Environmental and Health Considerations
Reclaimed slate cuts waste and saves natural stone, but it can bring risks like old paint, mortar, or lead. Always check for contaminants and handle materials safely for your crew and anyone in the building.
Checking for Contaminants
Test any suspicious surfaces for lead paint and asbestos before you move or cut slate. Send samples to a certified lab if the tiles came from buildings built before 1978 or if you spot old coatings.
Look for mortar with odd colors or soft patches; that can mean contaminants or degraded lime and may need to come off. Check for oil, tar, or chemical stains on the back of tiles—these could be leftovers from old roof treatments.
Keep track of the slate’s source and any lab results. Keep records with each shipment so roofers know which batches need special handling. If you’re buying from Reclaimed Slate Roofing, ask for their inspection and cleaning notes.
Ensuring Safe Handling and Use
Wear PPE: N95 or P100 respirators for cutting or dry handling, gloves, eye protection, and long sleeves. Wet-cutting helps keep dust down. Use local exhaust or HEPA-filter vacuums for grinding, cutting, or sanding slate.
Train crews on safe lifting—these tiles are heavy. Store reclaimed slate on sturdy pallets, off the ground, and covered to keep out moisture and dirt. Label any bundles that need special disposal or might have questionable coatings.
Dispose of waste according to local rules for construction and hazardous materials. If you find lead or asbestos, follow regulated procedures and use licensed abatement contractors when needed.
Comparing Reclaimed vs. New Slate
Reclaimed slate often gives you longer life, lower embodied carbon, and unique color that new quarried slate just can’t deliver. New slate gives you uniform thickness, predictable warranties, and easier matching for big new projects.
Durability Differences
Reclaimed slate has already survived decades of weather. Each piece has proven freeze-thaw resistance and natural hardness, so many reclaimed tiles will last 50–100 years if installed right. Some will show edge wear or micro-cracks; a careful inspection by you or your roofer will catch lighter pieces that need thicker underlayment or closer nailing.
New slate comes in set grades and consistent thickness, which makes installation quicker and lets you count on manufacturer warranties. New pieces skip the old nail holes and broken tails, which means less rework on big jobs. You really have to balance what you need: reclaimed for long-term proven performance and character, new for uniformity and easier warranty claims.
Aesthetic Variations
Reclaimed slate brings weathered patina, subtle color shifts, and irregular edges that create a layered, historic look. If you want a true restoration or a roof that fits with older architecture, reclaimed slate has the texture and color variation you won’t get from new. It’s smart to sort reclaimed batches by color and thickness on-site for a consistent look.
New slate gives you tight color control and uniform size, which works for modern designs or when exact matching matters. You also get to pick a precise gauge and finish for a cleaner, more engineered look. If you’re sourcing reclaimed materials from Reclaimed Slate Roofing, expect pre-sorted batches and documentation on origin to help you plan the final appearance.
Verifying Authenticity and Provenance
Ask for documentation that shows where the slate came from. Look for deconstruction records, photos of the original roof, or notes on the building age. With authentic reclaimed slate, you should see a clear chain of custody—anything less, and it’s worth digging deeper.
When the slate arrives, give it a proper inspection. Genuine reclaimed slate tends to show its age: weathering, old nail holes, and a bit of edge wear. Natural slate usually has a consistent texture, a range of earthy colors, and layers you can spot by eye.
Try a few simple tests. Tap a piece—real slate gives a solid, dull sound, not the hollow clack of synthetics. Check the thickness and heft; older slate often feels denser than modern copies.
Don’t skip the sample batch. Before you commit, ask for several pieces to check grain, color, and durability. If you can, build a small test patch or mockup. It’s better to find surprises here than halfway through your project.
Ask vendors about their process. Do they clean, grade, and inspect each piece before shipping? Reclaimed Slate Roofing says they do—ask for proof so you know what you’re getting.
Keep written records for every order: source, batch photos, inspection notes, delivery dates. You’ll thank yourself later, especially if you need to match pieces down the road.
Selecting a Reliable Reclaimed Slate Supplier
Choosing the right supplier removes risk from the project. You need clear documentation, consistent grading, and material that is ready to install. Look for suppliers that can verify origin, inspect every piece, and provide straightforward delivery terms without delays or uncertainty.
Built for Consistency and Jobsite Reliability
Reclaimed Slate Roofing sources slate directly from architectural demolition sites and historic structures. Every piece is inspected, cleaned, and sorted by size, thickness, and color before shipping. You receive material that is consistent, vetted, and ready for installation.
Orders are handled with clear timelines and typically ship within days. Delivery goes directly to your jobsite, reducing handling and keeping projects on schedule. Batch consistency also makes matching existing roofs more efficient, with less sorting required on site.
What to Expect from a Professional Supplier
- Documented origin: Slate sourced from verified structures, not mixed or unknown stock
- Full inspection process: Each piece checked for strength, thickness, and defects
- Clear grading: Defined standards for size, wear, and consistency
- Accurate order details: Photos, dimensions, and batch information provided upfront
- Reliable logistics: Defined lead times, secure packaging, and direct delivery
Grading and Quality Standards
Reclaimed slate should be sorted into clear grades based on condition and consistency. Expect defined criteria for thickness tolerance, surface wear, and size variation. Reliable grading ensures predictable installation and reduces waste.
Batch tracking is also important. Orders should include lot details so materials can be matched for future repairs or additions. This level of consistency supports both performance and long-term maintenance.
Ordering with Confidence
Before placing an order, confirm specifications, quantities, and delivery timing. Review batch details and ensure the material aligns with your project requirements. With properly vetted reclaimed slate, you avoid delays, reduce waste, and maintain the integrity of the finished roof.
Practical Tips for Buyers
Start by seeing samples in person. You’re looking for consistent color, soundness, and minimal breakage. Bring a tape measure—tile sizes can vary more than you’d think.
Always ask for provenance and testing docs. Request photos of the original building and any strength or moisture test results. Confirm if the pieces were cleaned and sorted before shipping.
Compare prices by square foot, not per tile. Figure in waste, special cuts, and skilled labor. Ask about delivery timelines and jobsite drop-off—details matter.
Order a small, mixed batch first. Throw them on a test patch to check visual match and how they cut. It’s a cheap way to dodge big headaches later.
Check how they handle and package the slate. Good packing means less breakage. Don’t forget to ask about replacement policies for damaged tiles.
Pick a supplier who inspects every piece. Reclaimed Slate Roofing claims to inspect, clean, and prep all their materials. That gives you some peace of mind, especially on high-end jobs.
Make a list of must-haves before you call. Note your color range, thickness, and how much damage you’ll accept. Clear specs speed up quotes and delivery.
Budget for skilled installers. Slate’s not a DIY thing—plan for lead times and the right tools.
Frequently Asked Questions
Here are some quick answers on spotting strong reclaimed slate, what tests the pros use, and how price and grade play into your project. There’s also a bit about upkeep so your roof lasts.
What are the signs of high-quality reclaimed slate?
Look for full-size tiles with straight, unwarped edges and few chips. Consistent thickness across the batch usually means it was removed and sorted with care.
Check the surface for natural cleavage and a tight grain. Avoid pieces with deep flaking or layered delamination.
Color should be even within the same lot. Some weathering is fine, but big stains or heavy mineral buildup can mean weaker stone.
What methods are used to assess the durability of reclaimed slate tiles?
Start with a visual check: hold tiles up to the light and look for hairline cracks. If you spot fractures, toss those aside.
Give each tile a tap—if you hear a clear, ringing sound, it’s probably solid. A dull thud? Could be trouble inside.
Ask about the slate’s history and source. Tiles from long-standing roofs that came off carefully tend to hold up better.
How can you tell if a piece of reclaimed slate is suitable for your roofing project?
Match thickness, endurance rating, and exposure length to your roof’s needs. Thin or mixed-thickness batches need extra sorting.
Look for consistent size and prebored nail holes if you want easier installation. Odd sizes will slow you down and create more waste.
Make sure color and texture match your design or existing roof. Get a sample pallet and check it on-site if you can.
What factors influence the price of reclaimed slate?
Rarity and color drive price up—unusual hues or historic sources cost more. Condition matters too: nearly perfect pieces fetch higher prices.
Labor to reclaim and sort adds to the cost. If tiles need lots of cleaning or repair, the price per piece goes up.
Delivery and batch size matter. Small orders usually mean higher per-tile shipping and handling.
How to differentiate between various grades of reclaimed slate?
Grade A: full-size, sound tiles with clean surfaces and even thickness. Use these for main roof areas.
Grade B: minor chips, patched corners, or small hairline cracks. These work for flashings or less visible spots.
Grade C: irregular sizes, heavy weathering, or lots of repairs. Save these for decorative work or places where strength isn’t as critical.
Always ask your supplier for their grading criteria and sample photos so you know exactly what you’re getting.
What maintenance considerations should be taken into account when purchasing reclaimed slate?
Plan to check your roof after storms, and give it a closer look every few years—especially if it’s getting up there in age. Spotting loose or slipped tiles early can save you some real headaches with leaks.
It's smart to stash away a few matching tiles from the original batch for repairs down the line. Trust me, finding the right color and thickness years later can be a pain.
Set aside some budget for skilled roofers who know their way around reclaimed slate. Proper nailing, underlayment, and flashing make a huge difference in how much maintenance you'll deal with later. If you need help finding vetted, job-matched batches or quick delivery for spares, Reclaimed Slate Roofing has your back.