Repairing a roof with reclaimed tiles allows you to match existing materials while maintaining durability and long-term performance. Reclaimed slate and clay tiles offer proven strength, natural weathering, and consistent appearance, making them a practical choice for both historic repairs and high-end projects. They also reduce waste by keeping usable materials in circulation.
This article outlines how to select the right reclaimed tiles, prepare the roof, and handle installation and maintenance effectively. The focus is on practical steps that ensure repairs integrate cleanly with the existing roof and perform reliably over time.
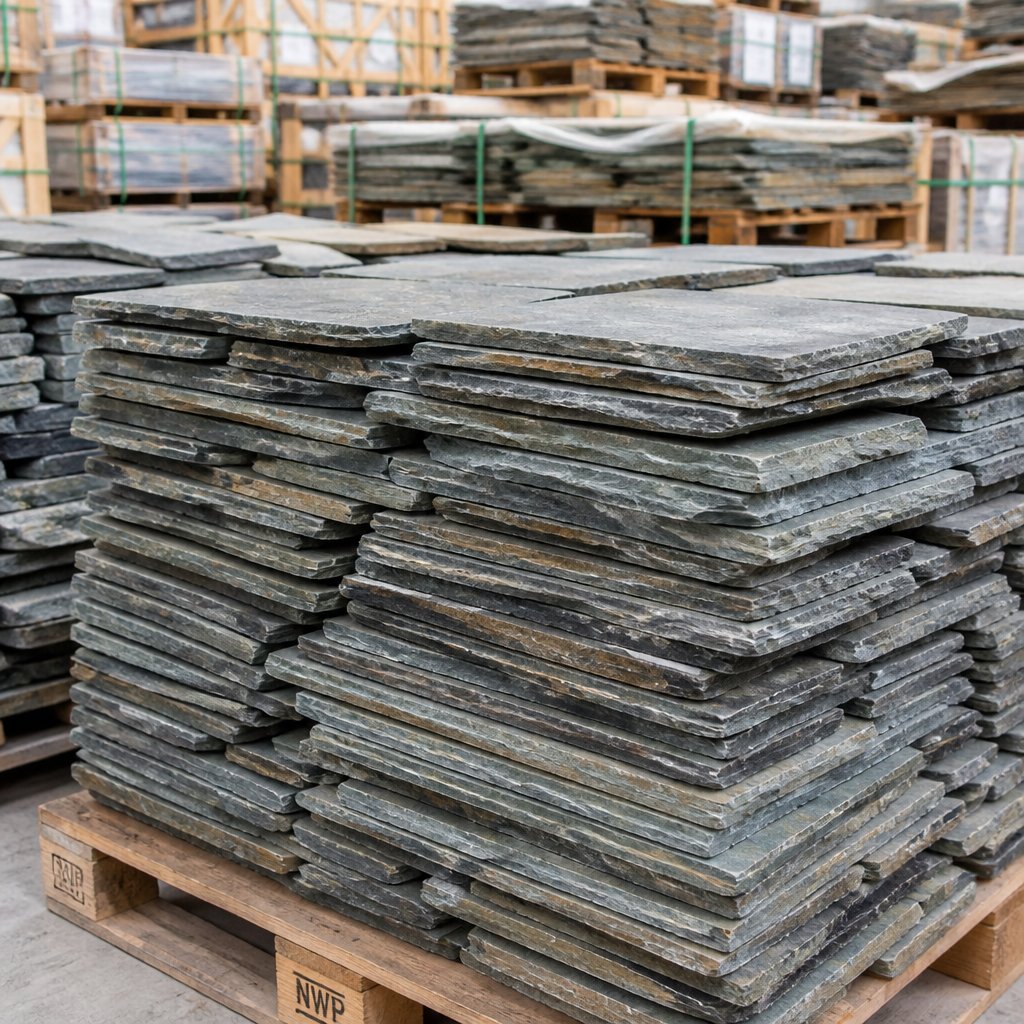
Reclaimed Slate Roofing supplies reclaimed slate and clay tiles that are inspected, cleaned, and sorted for reuse. Materials are prepared for consistent installation and shipped directly to jobsites, helping contractors and property owners complete repairs efficiently without material inconsistencies.
Reclaimed Tile Solutions
Reclaimed tiles help cut waste, save money, keep that historic vibe, and, honestly, they often last longer than a lot of new stuff out there.
Sustainability and Environmental Impact
When you reuse tiles, you keep old materials out of the landfill. Every reclaimed slate or clay tile you install means less new quarrying or manufacturing—so less fuel burned, less mining, fewer emissions. That’s a win for the planet.
You’re not just saving on trash, either. For historic projects, reclaimed tiles keep the original look and feel, and you don’t waste energy making fake replicas. If you need to show off your eco-credentials for permits or green programs, using reclaimed tiles is a concrete way to prove it.
Cost Savings for Homeowners
Reclaimed tiles usually cost less than fancy custom or “premium” new materials. You skip the new-quarry price tags and get high-quality stone or clay that’s already stood the test of time. That can drop your upfront repair costs.
Labor’s about the same, but if you’re just patching a section, you don’t have to buy a whole new roof. Plus, you save on dumping fees and transport if you’re not hauling away a bunch of old stuff. And hey, in historic neighborhoods, a real reclaimed roof can bump up your home’s value.
Aesthetic Appeal and Customization
Reclaimed tiles bring that natural patina, color variation, and unique cuts you just don’t get with new tiles. It’s the real deal for period homes or anyone after a roof with some soul. You can get a close match to your existing roof lines and tones, which is huge if preservation boards are involved.
Mixing sizes, colors, or textures lets you blend in repairs or create a cool, weathered look. Reclaimed Slate Roofing inspects their stock, so you can actually pick pieces that fit your vision without faking it.
Durability and Longevity
A lot of reclaimed slates and clay tiles have already lasted 50–100 years. That’s a pretty solid track record against freeze-thaw, sun, and wind. If you install them right—good nails, proper underlayment—you’ll probably get decades more.
Repairs are less of a nightmare, too: swap a tile here or there instead of redoing the whole thing. Just check for cracks or warping before you accept a batch, and you’ll have a roof that’s got your back for years.
Selecting the Right Reclaimed Tiles
Pick tiles that match your roof’s material, shape, and condition. Color, thickness, and fastening style all matter if you want your repair to blend in and hold up.
Understanding Tile Materials
There are three main types: slate, clay, and terracotta. Slate is thin, dense, and splits into flat sheets—great for pitched roofs and lasts a lifetime. Clay and terracotta are thicker and shaped, good for Mediterranean or older styles.
Check thickness and edge profile. Slate needs copper or stainless fasteners, sized right. Clay tiles might need different batten spacing or clips. Make sure your roof structure can handle the weight.
Ask where the tile came from. Stuff salvaged from well-built old roofs tends to be more durable. Keep notes on the batch for future repairs.
Matching Existing Roof Styles
Start by snapping a clear photo and grabbing a sample of your current tile. Compare color in daylight and check for things like lichens or patina.
Get the shape and profile right—whether that’s square slate, rectangular, pantile, or interlocking clay. If your roof used double-lapped slate or special cuts, hunt down reclaimed tiles with the same details.
Check how the old tiles were fastened and overlapped. Copy those details so your repairs shed water the same way.
Identifying Quality and Wear
Look for cracks, delamination, or freeze-thaw damage. Minor chips aren’t a big deal, but splits or layered breaks will fail fast.
Tap a tile and listen—it should sound clear and solid. If it’s dull or hollow, there’s probably a hidden break. Watch out for old repairs or heavy mortar that could hide issues.
Tiles should be a consistent thickness and have good edges. Uniform pieces go in easier and hold fasteners better. If a batch has too many duds, pass on it.
Sourcing Reliable Suppliers
Stick with vendors who actually vet, clean, and grade their tiles. Ask for photos, measurements, and a return policy.
Get documentation: where the tiles came from, inspection notes, and how many are ready to install. Make sure the shipping method protects the tiles—palletized and crated is best.
If you need special pieces like ridges or trims, look for suppliers with a broad inventory. Reclaimed Slate Roofing keeps detailed stock and can usually deliver fast.
Preparation for Roof Repairs Using Reclaimed Tiles
Plan ahead, check your roof and tiles, and set up your workspace so everything’s safe and efficient. Matching tile dimensions and spotting hidden damage early saves you headaches later.
Inspection and Assessment of Roof
Only climb up if it’s safe, and use fall protection. Walk the roof, look for broken or missing tiles, and measure the pattern of the courses.
Check underlayment, flashing, valleys, and the ridge for rot or rust. Probe any soft spots and mark where you’ll need to fix sheathing. Record tile sizes and coursing so you can order the right reclaimed pieces.
Take photos and make quick sketches of damaged areas. Use these to figure out how many tiles you need and what types. If there’s structural work to do, tackle that before you start re-tiling.
Safety Precautions and Setup
Set up fall protection and tie off your ladders. Use toe boards or scaffolding on steep roofs for safer footing and a place to stage tiles.
Keep paths clear for moving materials. Store tiles on pallets on flat, dry ground nearby. Label your stacks by size and grade to cut down on trips up and down.
Wear gloves and eye protection—old tiles can be sharp. Keep a first-aid kit handy and make sure someone’s watching out while you’re up there.
Cleaning and Sorting Reclaimed Tiles
Check every tile for cracks or signs of delamination. Tap them—if they sound brittle or hollow, toss them.
Clean off mortar and moss with stiff brushes and, if needed, a gentle spray. Don’t use high-pressure water on slate; it can split layers. Let everything dry before sorting.
Sort by size, thickness, color, and edge condition. Set aside a stash for cutting at hips and valleys. Label your piles and write up a parts list so you’re not scrambling for matches mid-job.
Installation Process for Reclaimed Tiles
You’ll pull out the broken tiles, fit reclaimed ones, and seal everything to keep water out. Take your time, check each piece, and use the right fasteners for a repair that lasts.
Removing Damaged Tiles
Only take out what’s cracked, slipped, or loose. Pry up the tiles just enough to get at the nails, then lift the damaged one straight out to avoid breaking others.
Check the roof deck and underlayment underneath. Replace any rotten sheathing and trim back damaged underlayment. Fix it up with matching plywood or OSB and secure underlayment edges with roofing cement.
Save the old tiles as templates for sizing replacements. Clean out debris and old nails before you start fitting new pieces.
Fitting and Securing Reclaimed Tiles
Sort your reclaimed tiles by size, thickness, and curve. Pick ones that match the roof’s plane and profile so lines stay even.
Slide each tile into place so it interlocks well. Use a slate ripper or similar tool to pull old nails and clear a spot for the new tile’s nail or hook. Nail with stainless or copper—set the heads flush, but don’t overdo it.
Trim tiles with a diamond blade or scoring tool for a tight fit at hips, valleys, or edges. Use templates from the old tiles for odd shapes. Always test-fit before nailing down to avoid cracks.
Ensuring Proper Waterproofing
Lay down continuous underlayment—synthetic felt or two layers of 30# felt works. Overlap at least 3 inches uphill, and seal seams with roofing tape.
Use metal flashing at chimneys, valleys, and steps. Tuck it under the tiles and seal with roofing cement where needed. In valleys, a lined metal valley is a good call for long-term water control.
Check all nail holes and exposed edges. Dab a bit of compatible sealant at cut edges and step flashings. Run a hose test over the repaired area before calling it done—better safe than sorry.
Maintaining and Caring for Reclaimed Roof Tiles
Stay on top of regular checks, gentle cleaning, and quick minor repairs to keep your reclaimed tiles solid and true to their age. When you swap tiles, match thickness and fastening style, and don’t go overboard—gentle methods keep that natural patina looking great.
Routine Inspections
Get up there every spring and after big storms. Look for cracked or missing tiles, loose nails, and any flashing that’s shifted.
Pay extra attention to valleys, ridges, and chimneys. If you spot water stains in the attic, you’ve probably got a leak. Take photos and note problem spots for repairs.
Watch for moss or lichen—these can hide cracked edges and trap moisture. Jot down tile size and color on your inspection notes so you can get good matches later.
Keep a log of what you find. It helps spot patterns and proves maintenance history if you ever need to show it to a buyer or insurer.
Cleaning Techniques Specific to Reclaimed Tiles
Stick with soft, non-abrasive tools. A gentle rinse (nothing over 1500 psi—really, lower is safer) or just a hose and soft brush will clean without cracking tiles.
Skip acid cleaners or strong bleach—they can wreck old clay or slate and strip away the weathered finish. For moss, use a diluted, tile-safe biocide and rinse after it sits.
Work top down, and always tie off if you’re on a steep roof. Clean out gutters and valleys by hand to stop water pooling.
Try any cleaner on a spare tile first. Keep a few replacement tiles from Reclaimed Slate Roofing handy, just in case cleaning reveals hidden damage.
Repairing Minor Damages
Swap out cracked or broken tiles fast to avoid leaks. Match size, thickness, and profile—don’t use a mismatched tile that’ll just cause new problems.
Use copper or stainless nails and the right hooks. If the original roof used mortar with flashings, bed them with compatible stuff—don’t use Portland cement on soft old tiles.
For slipped tiles, gently lift the row above, reseat, and secure. Small chips can be patched with a waterproof grout if the tile’s still strong.
Keep spare reclaimed tiles and labeled photos of patterns nearby. It makes repairs a lot quicker and keeps your roof looking consistent.
Comparing Reclaimed Tiles to New Roofing Materials
Reclaimed tiles tend to match historic roofs for looks and toughness. New materials might be more uniform or quicker to install, but you’re trading off on cost, lifespan, and environmental impact. It’s worth weighing what matters most for your project.
Performance and Lifespan
Reclaimed slate and clay tiles were built to stick around. You’ll find plenty of reclaimed slates that are already 50–100 years old, still doing their job just fine if installed right. They naturally resist weathering, and you can actually see their track record on old buildings—pretty reassuring, honestly.
Learn more about slate’s natural resistance here.
New roofing materials, like synthetic slate or modern clay tiles, usually last 30–60 years, depending on the specific product and how it’s put on. They tend to be lighter and easier to cut, which can speed things up for installers. On the flip side, synthetics might fade or warp faster than real stone, especially under harsh sunlight.
When you’re repairing, matching the feel and function of the original matters. Go with reclaimed tiles if you need the same thickness, nail holes, or flashing details as the original. New materials make sense if you want uniform sizing, faster installs, or a manufacturer’s warranty.
Cost Differences
Reclaimed tiles sometimes cost more per piece than your average shingle, but on specialty projects, that gap isn’t always as wide as you’d think. Labor costs can be steeper since installers have to sort, fit, and occasionally trim older tiles. Still, for high-end restorations, the value of reclaimed material often makes the extra effort worth it.
New materials usually mean lower upfront costs and quicker installs. Synthetics cut down on shipping weight and can lower your overall bill. Warranties on new products might cover decades, which is nice for budgeting, though you could end up replacing cheaper materials more often in the long run.
It’s worth thinking about the big picture: reclaimed tiles might help you avoid future replacements. When you compare quotes, factor in matching, shipping, and the need for skilled labor. If you want to control quality and cut down on sorting at the job site, Reclaimed Slate Roofing can help you source vetted tiles.
Environmental Considerations
Reclaimed tiles are a win for waste reduction. Reusing slate or clay keeps tough materials out of landfills and skips the emissions from new quarrying or manufacturing. Plus, you get to keep the original craftsmanship and the building’s character—there’s something satisfying about that.
New materials have a mixed environmental impact. Synthetic slates might use recycled plastics but still need energy to produce. New quarried slate and clay add extraction and processing to their carbon footprint, which is hard to ignore compared to reusing what’s already there.
If your client cares about sustainability, reclaimed tiles are hard to beat. They offer lower embodied carbon per tile and keep resources in play longer. For restoration projects, reclaimed just makes sense if you want to preserve both material and history.
What Could Go Wrong - And How To Avoid It
You’ll probably run into two main headaches: finding tiles that actually match in size, color, and profile, and dealing with pieces that have seen decades of weather. Both take a sharp eye and a little strategy to get right.
Finding Compatible Tiles
Start by measuring tile length, width, thickness, and the profile right on the roof. Grab at least five samples from different spots to get a good average, and check for any factory marks or unique patterns. Snapping photos from a few angles—with a ruler in the shot—makes it way easier for suppliers to help you match.
Don’t forget to check installation details: nail type, how much of the tile is exposed, and how the underlayment overlaps. These details affect how your reclaimed tile will fit. Order extra—10–20% more than you think you’ll need—to cover cutting, breakage, and future repairs.
Work with a supplier who inspects and grades their stock. Reclaimed Slate Roofing checks, cleans, and grades tiles before shipping so you’re less likely to be surprised on site. Keeping a small stash of matched tiles around for emergencies isn’t a bad idea, either.
Addressing Weathering Issues
Look over each reclaimed tile for cracks, delamination, or heavy erosion. A moisture meter is handy, but even a simple tap test works: a clear, solid sound usually means the tile’s good; a dull thud might mean it’s damaged inside. Toss out anything with hairline fractures or signs of delamination.
For tiles with surface wear, a gentle cleaning and a breathable sealer can bring back some life and slow down future decay. Avoid coatings that trap moisture under the surface. If a tile is really far gone, just replace it—patch jobs rarely last and can lead to leaks.
Whenever you’re reusing old tiles, upgrade the underlayment and flashing, especially around penetrations and eaves. Modern underlayment gives you a safety net under worn tiles and can stretch out the roof’s lifespan. It helps to label and catalog reclaimed batches by delivery date and origin for future repairs.
Incorporating Modern Upgrades with Reclaimed Tiles
You can keep the classic look of reclaimed tiles and still add modern insulation or solar tech that meets code and improves performance. The trick is using methods that protect the old tiles and fit into standard roofing workflows.
Enhancing Insulation
Add a high-performance underlayment and rigid insulation above the deck to cut heat loss—no need to mess with the tiles themselves. Closed-cell foam or polyiso boards, sized for your local R-value rules, go over the sheathing and under the battens that hold the reclaimed slate or clay. This way, you keep the tiles’ face exposed and avoid gluing anything to historic material.
Ventilation still matters, though. Make sure there’s a continuous airflow path from ridge to soffit, or use ventilated battens to stop moisture from getting trapped. Seal up roof penetrations with long-lasting flashing, and use a breathable membrane to keep out wind-driven rain while letting vapor escape.
Integrating Solar Solutions
Mount lightweight solar panels on rails above the reclaimed tiles—no drilling through the tiles, please. Use tile hooks or clamp mounts that attach to the battens or deck, not the tiles themselves. That way, you protect fragile pieces and keep things reversible for the future.
For a cleaner look, pick low-profile, framed panels and stick to roof planes that get the most sun. Have a roofer who knows reclaimed materials check mounting points, swap out any broken tiles, and document all penetrations. Tie every penetration into new flashing and test for leaks before you button things up.
Professional Installation vs DIY Repairs
Should you hire a pro or go DIY? It really comes down to your skill, comfort with heights, and the value of the tiles. Reclaimed tiles can be fragile and a bit quirky—handle them wrong and you’ll end up with broken pieces or leaks.
A contractor brings experience with flashing, underlayment, and matching tile courses. They work faster, lower the risk of mistakes, and usually warranty their labor—which is a nice safety net when you’re working with rare reclaimed materials.
DIY can save cash, but it’s riskier. You’re responsible for safety, code compliance, and any goofs. Make sure you’ve got the right tools, ladders, fasteners, and a solid plan for sorting and grading reclaimed tiles.
Here’s a quick checklist to help you decide:
- Safety gear and fall protection for DIY
- Time and skill needed to cut and fit irregular tiles
- Cost of wasted or broken reclaimed tiles
- Warranty and liability differences (pro vs DIY)
If your project uses high-value reclaimed slate or antique clay, seriously consider hiring a roofer who knows reclaimed materials. Reclaimed Slate Roofing inspects and grades tiles before shipping, which makes life easier whether you’re installing them or passing them off to a contractor.
Frequently Asked Questions
These cover where to find reclaimed tiles, how to repair with them, matching by color and size, buying used slate, creative reuse, and whether sealants like Flex Seal work as a stopgap.
How can I find reclaimed tiles for repairing my roof?
Start with salvage yards, architectural reclaimers, or demolition auctions nearby. Look for suppliers who vet and clean materials before selling.
Don’t overlook historic preservation groups or local roofing contractors—they often know where matching batches turn up. Ask for photos, measurements, and any background info.
Reclaimed Slate Roofing offers inspected, authentic slate and clay tiles and can ship quickly if you need vetted stock.
What are the best practices for repairing roofs with reclaimed tiles?
First, measure the damaged area and note tile dimensions, thickness, and nail hole patterns before you buy replacements. Always get a few extras for cutting and future repairs.
Handle tiles gently—these things can crack if you’re not careful. Use matching fasteners and underlayment as recommended for that tile type; slate and terracotta need different details. Swap broken tiles one at a time and check the nails and flashing around them.
Take photos and notes of the existing roof. Preservation boards may want proof of your match and repair method, especially for historic properties.
Where can I buy used slate roof tiles?
Check out suppliers that focus on reclaimed roofing or architectural salvage. Ask for inspected batches and shipping options to your site.
Sometimes local demolition firms or historic renovation projects sell usable slate by the pallet. Always verify thickness, color, and condition before you buy.
What are some creative ways to repurpose old roof tiles?
Cut smaller pieces for garden edging, stepping stones, or masonry inlays. Whole tiles look great as planters, house numbers, or rustic wall cladding.
Broken fragments? Try mosaics or craft projects. If you’re using porous clay tiles outdoors, seal them first to handle water exposure.
How do I match old roof tiles when doing repairs?
Record the tile’s length, width, thickness, gauge, and color patina. Measure the visible face and note overlap and bond patterns.
Line up reclaimed batches next to your existing tiles on the roof. If you can’t find an exact match, pick the closest grain and color, and plan to use those in less visible areas. Sometimes, close is close enough—at least for the back side of the house.
Can products like Flex Seal be effective for temporary roof tile fixes?
You can grab a rubberized sealant for those annoying little leaks or hairline cracks in roof tiles. It’s a quick fix—just spray or brush it on, and you’ll get a weatherproof barrier that’ll hold up until you’re ready for real repairs.
But honestly, if you’re dealing with bigger problems like cracked or missing tiles, or if the underlayment’s shot, don’t expect these products to save the day. You’ll need to swap out the damaged tiles, patch up the underlayment, and get the flashing sorted if you want to stop leaks for good.