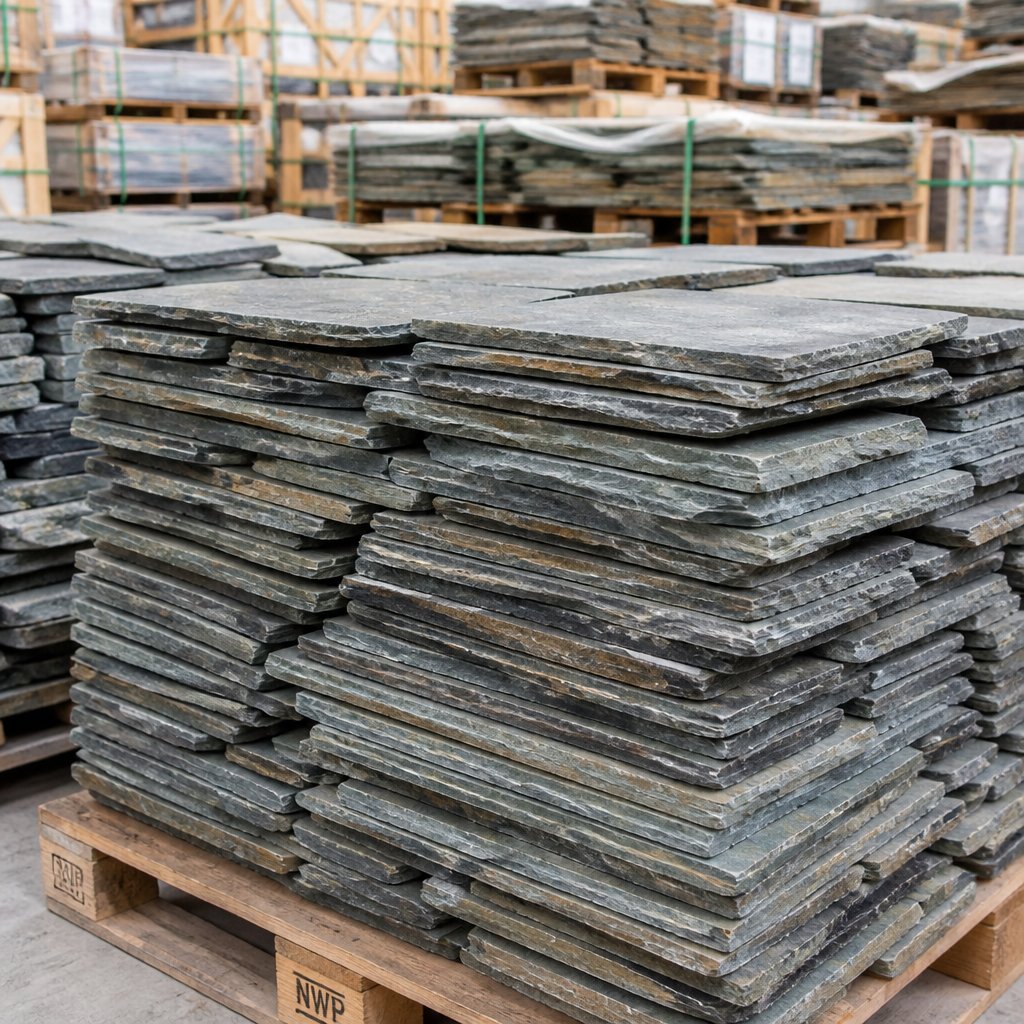
You need a clear way to evaluate reclaimed tiles before they hit your jobsite. Grading does exactly that. It sorts materials by condition, size, color, and historic value so you know what you are working with from the start.
This guide breaks down how grading works in practice. What inspectors look for, how materials are categorized, and how those grades affect price, performance, and installation. You will also get practical tips for reviewing batches, confirming consistency, and selecting the right material for your project.
Whether you are handling a full restoration or a new build, grading helps you match material to the job without guesswork. Reclaimed Slate Roofing applies consistent grading standards to every batch, so you can choose with confidence and keep your project on schedule.
Reclaimed Tile Grading
Grading tells you the condition, size consistency, and suitability of each reclaimed tile for reuse. It lets you decide if tiles meet restoration standards, can go on a visible slope, or should be saved for patch repairs.
Grading is just a system for sorting reclaimed tiles by condition and usability. Grades usually range from high-quality pieces that are intact and uniform to lower-quality ones with chips, breaks, or heavy wear.
A typical grade list covers:
- Structural soundness (no major cracks)
- Surface and color that look decent
- Size and thickness within a certain range
- Original features like nail holes or fins
Each graded batch should spell out what defects are allowed. That helps you figure out how many tiles you’ll need and whether you’ll be doing extra sorting on site.
How Grading Differs From New Tile Assessment
With new tiles, you’re checking factory specs and uniformity. Reclaimed grading, though, is more about the tile’s story: weathering, repairs, and wear from decades of use.
With reclaimed tiles, you look for:
- Old installation marks and past patching
- Edge wear that could affect how tiles overlap
- Hidden hairline cracks that might get worse under pressure
You have to expect some variability. New tiles are predictable; reclaimed ones need more sorting and care during installation to get a consistent look and solid performance.
Key Factors Influencing Grading
Age and provenance matter a lot. Tiles from a single old roof usually match better than a mixed batch.
Other big factors:
- Condition: chips, cracks, and delamination
- Color and patina: consistency is key for visible roofs
- Size variance: affects cutting and flashing
- Dry rot or mineral breakdown in clay tiles
- How many usable pieces per square (waste ratio)
Always ask for a piece-count report and photos before you order. If you’re working with Reclaimed Slate Roofing, get their inspection notes and grade definitions so you can plan labor, matching, and replacements.
Main Tile Grading Categories
Grades tell you how each reclaimed tile performs, what flaws to expect, and where it fits on a roof. Grade guides your decisions on cost, placement, and whether a tile works for visible slopes or hidden spots.
Premium Grade Explained
Premium grade tiles show little wear and the best color match. Expect whole pieces with sharp edges, steady thickness, and barely any chips. These are for main roof fields and spots where looks really matter.
You can use premium tiles on steep pitches and historic restorations with no obvious patching. They usually come from well-preserved roofs and get sorted more strictly for durability.
Premium costs more, but you save time sorting and replacing tiles during install. If you’re after guaranteed color runs or matching roof planes, just ask for premium when you order.
Standard Grade Characteristics
Standard grade tiles have typical weathering and some edge wear. You’ll see the odd chip, a little thickness variation, and maybe a stain or two. They’re great for most field areas where tiny flaws are fine.
Mix standard tiles with premium on visible slopes to keep your costs down. Installers should sort on-site: put the better pieces near ridges and save the more worn ones for less visible spots.
Standard grade usually balances life expectancy and value. They’re still strong, but check for cracks and set those aside before nailing.
Utility Grade Overview
Utility grade has the most flaws—think broken corners, patched spots, odd sizes, and old nail holes. Use utility tiles for underlayment, soffits, or other spots you won’t see.
Don’t rely on utility pieces for high-profile rooflines or exposed areas unless you’re ready to cut and splice. They’re handy for matching odd lots, filling gaps, or saving money where appearance isn’t a big deal.
When buying utility grade, check the percentage of whole versus broken tiles and ask about sorting. Mixing with higher grades can cut waste and speed up installation.
Criteria for Grading Reclaimed Tiles
You’ll judge reclaimed tiles by their appearance, strength, color consistency, and whether their size and flatness fit your installation needs. These points affect your cost, project fit, and expected lifespan.
Surface Wear and Patina
Surface wear shows a tile’s history and changes how it sheds water. Look for granule loss, flaking, and erosion. Small, even wear is usually fine; deep pitting or layered delamination means a reject.
Patina can add character, but it has to be stable. Hard, weathered crusts that stay put are good. Loose powder, mold, or salt deposits need cleaning and might hide bigger problems.
Check edges and nail holes. Crumbling or cracked edges make installation tricky and can cause leaks. Mark tiles with moderate edge wear for lower-grade uses or for cutting.
Color Consistency
Color matters for matching new or old tiles. Group tiles by shade and pattern before buying. Expect some natural variation—tight color matching needs bigger sample lots.
Flag tiles with sudden color changes from chemical stains or fire damage. That can mean the tile’s minerals have weakened. Minor fading from sun is just cosmetic and usually fine.
If you want a precise match, ask for samples or do a mockup on-site. Label each pallet and keep notes so you can mix batches on the roof to avoid obvious banding.
Structural Integrity
Structural integrity is about whether a tile can handle wind, freeze-thaw, and foot traffic. Look for hairline cracks, through-cracks, and repairs like hidden metal patches. Any through-crack? That’s out for main roofing use.
Tap-test tiles for a clear, ringing sound; a dull tone often means internal delamination. Pull out old nails and check holes. Enlarged or split nail holes weaken the hold and might need fixing.
Stick with tiles that meet your project’s load and exposure needs. For high wind or cold, go with higher-grade tiles with no hidden defects and, if possible, some testing behind them.
Tile Dimensions and Flatness
Consistent dimensions make installation faster and cut down on waste. Measure length, width, and head lap on a sample from each lot. Flag any tiles outside your limits before you order.
Flatness impacts water flow and flashing. Lay tiles on a flat surface to check for warping or cupping. Small warps can sometimes be fixed; big twists or cupping cause gaps and should be tossed.
Keep records of dimensions and flatness when your tiles arrive. That’ll help you plan cuts, underlayment, and special flashing so the roof stays tight.
Common Grading Systems in the Industry
Let’s look at the main grading approaches and what to check when buying reclaimed tiles. Each system focuses on condition, fit, and usability—not just age.
European Grading Practices
European grading usually uses letter or class codes tied to condition and historical value. You’ll see grades like A, B, C or 1–3, where A/1 means almost original, with barely any wear and good nail holes. Lower grades have more chips, broken corners, or old trimming.
Inspectors in Europe pay close attention to thickness, provenance, and whether the piece keeps its original hanging system. Ask for photos and thickness measurements. Find out if tiles were flattened, cut, or matched to a specific roofline.
European sellers often group tiles by color family and production era. This helps you match visible roofs and get similar weathering. Regional names and vintage terms can vary, so double-check criteria before buying.
North American Standards
North American grading isn’t as standardized and usually mixes visual grade with functional tests. Sellers sort tiles into “architectural,” “serviceable,” and “salvage” bins. Architectural tiles have little damage and fit modern flashing. Serviceable ones need small repairs; salvage needs a lot of work.
If you’re in a cold climate, check freeze-thaw resistance for clay and terracotta. Ask for spalling tests, thickness, and whether tiles were pressure-washed or cleaned. U.S. suppliers often label batches with quantity and usable percentage so you can estimate loss.
Since standards vary, get a sample shipment or visit a yard if you can. That lets you judge the match, replacement rates, and whether the batch meets local code.
Custom Dealer Grading Methods
Dealers sometimes make their own grading systems to fit their stock and what buyers want. You might see numeric scores, color tags, or boxes labeled “A-Select,” “B-Reclaim,” and “C-Project.” Each label means something different for breakage, edge condition, and reuse rate.
When buying, ask for a written grading key and a breakdown of usable percentage per grade. Request tile photos and a note on any refurbishment—cleaning, pinning, or re-sawing. Reclaimed Slate Roofing, for instance, checks each piece and usually provides batch notes and counts.
Use a quick checklist: verify grade definitions, confirm measurements, get a sample. That way, you protect your schedule and can plan for waste and installation time.
Visual and Aesthetic Considerations
How tiles look affects curb appeal and how much repair you’ll need. Watch for chips, surface patterns, and historic marks to see if tiles fit your project and budget.
Chips and Edge Conditions
Chips and broken edges change how tiles sit and lock together. Small edge chips are common and usually just cosmetic; you can use these on slopes or cut them for field pieces. Bigger breaks along the bed or headlap can mess with weatherproofing and might need patching or a swap.
Check edges for straightness and thickness. Uneven edges make alignment tough and expose more underlayment. Note any tapered or irregular edges—these show up in hand-split slate and need skilled nailing and layout.
Sort tiles by damage before you start. Keep a stash of near-perfect tiles for visible lines and ridge transitions. Label batches so the more worn pieces go where they won’t stand out.
Patterns and Surface Variations
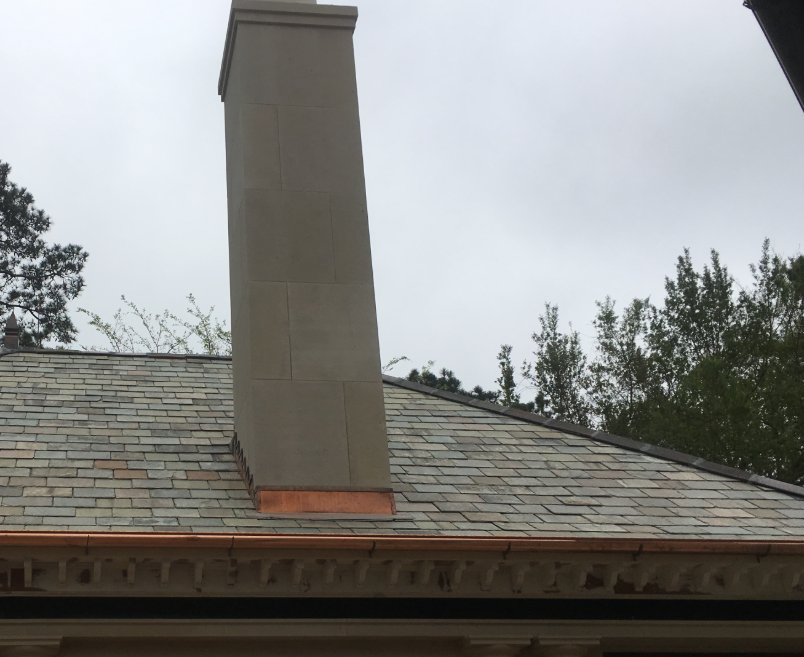
Surface color, cleavage lines, and old tooling give a roof its character. Expect a mix of earth tones in reclaimed slate and some variation in clay or terracotta. Decide if you want tight color matching or a mixed, weathered look.
Texture shapes shadow lines and water flow. Smooth, worn surfaces act differently than fresh, split slate; rougher surfaces might hold moss longer. Check for steady tile dimensions—variation means tighter layout control and can slow things down.
Try a mock-up area on the job to see how tiles look from the street. That lets you balance batches, test courses, and see if the patterns and textures hit your visual goals.
Presence of Historic Marks
Historic marks—nail holes, old maker stamps, leftover glazing, and repair patches—bring real character and prove authenticity. Sure, they show the tile’s age and sometimes hint at past wear or changes in performance, but for many folks, that’s part of the appeal.
Check out nail holes: if you see cracks or the holes have widened, that’s a sign you might need to reinforce those spots or use stainless fasteners to avoid future problems. Stamps and maker’s marks can be a lifesaver if you’re trying to match replacements from the same era or quarry.
Ask yourself how much history you want to show off. If you’re restoring an old place, you’ll probably want to keep those original marks—it just feels right. For new builds, maybe you’d rather pick through and use the cleaner, less-repaired tiles for a tidier look. Reclaimed Slate Roofing sorts and inspects their tiles, so you can strike a balance between personality and practicality.
Impacts of Grading on Pricing and Value
Grading’s a big deal—it sets the price and affects how long your reclaimed tiles last, how much you’ll spend on installation, and how the roof looks when you’re done.
How Grading Affects Cost
Higher grades come with fewer flaws, better color match, and less sorting on site. Grade A tiles cost more per square foot, but you save on labor and get a longer-lasting roof.
Lower grades are cheaper up front but bump up installation costs. Expect to spend more time sorting, trimming, and replacing broken pieces. You might need extra overlap or special flashing to deal with odd sizes.
Always factor in waste. Buy extra tiles depending on the grade—5–10% more for high grade, 15–25% or more for mixed or low grade. Shipping can cost more for heavy, carefully packed high-grade tiles, but that protects your investment.
Balancing Quality With Budget
Figure out what matters most before you buy. If you want a matched look and long life, go for higher-grade reclaimed tiles and accept the steeper price. That usually pays off with fewer repairs down the road.
If you’re on a tighter budget, you can mix grades. Use A-grade on the parts of the roof everyone sees, and B or C-grade in valleys, hips, or under the eaves. That way, you keep the look where it counts and save where you can.
Ask your supplier about their inspection, sorting, and return policies. Reclaimed Slate Roofing inspects and vets their material, which can help you avoid hidden costs like damaged or mismatched tiles.
Using Graded Reclaimed Tiles in Design Projects
Pick the right grade based on the roof’s slope, load, and how visible it is. Mixing grades lets you control both the look and the budget.
Choosing Tiles by Grade for Different Applications
Choose higher grades (tight, A) for the spots everyone notices: main roof planes, entryways, and façades. These have fewer chips and are more uniform, so they lay flat and keep the color even. Use them where it really matters.
Mid-grade (B) works well for dormers, smaller wings, or roof slopes that don’t stand out. They’re durable and cost less but might take more time to sort and install.
Lower grades (C or utility) fit best for underlayment, patching, or places nobody sees. They’re fine if structure is more important than looks. Just label the batches and keep track of thickness before you start, so you don’t end up with mismatched rows.
Blending Multiple Grades Creatively
Blending grades can help you balance cost and authenticity. Try starting with a band of A-grade on the main elevations, then switch to B-grade on less visible slopes. That way, you keep the eye-catching look where people actually look.
Some folks like to alternate rows of A and B-grade for a subtle, historic vibe. Just make sure thickness and nail-hole alignment are close, or you’ll get wavy courses.
On site, sort tiles by grade and thickness into separate pallets. Mark them clearly and plan your flashing and underlayment to deal with any quirks. If you got your materials from Reclaimed Slate Roofing, double-check the inspection tags and batch notes before you start laying tiles—it’ll save you headaches.
Use Grading to Make Better Material Decisions
Reclaimed tile grading gives you control. Instead of guessing, you know exactly what condition, consistency, and performance to expect before materials arrive on site.
The key is matching the grade to the job. Use higher grades where appearance and durability matter most. Use standard or utility grades where minor flaws will not impact performance. That balance helps you control cost without sacrificing results.
Grading also affects everything downstream. Installation time, waste percentage, and long-term maintenance all tie back to how well the material was sorted upfront. The more consistent the batch, the smoother the install.
For contractors and architects working on tight timelines, clear grading and documentation make a difference. Reclaimed Slate Roofing provides inspected, graded materials with defined batch standards, so you can plan quantities, reduce waste, and keep your project moving.
Start with material that is properly graded and ready to install. It saves time, improves results, and keeps your build on track from day one.
Frequently Asked Questions
Here’s where we get into how reclaimed tile grades work, what makes a tile right for floors or walls, the ups and downs of each grade, how wear ratings connect to grades, why water absorption matters, and where to find guidelines.
What factors determine the various tile grades?
Tile grade comes down to thickness, break strength, surface wear, and visible flaws like chips or cracks.
Where the tile came from and how old it is also matter—historic tiles often have a great patina, but their condition can be all over the place.
Inspection records and test results play a role, too. Suppliers should document cleaning, repairs, and any reinforcement before resale.
How can you tell if a tile is suitable for floor versus wall application?
Floor tiles need higher abrasion resistance and stronger bending strength than wall tiles.
Check the wear rating, thickness, and any lab results for breaking load if you want to use them on floors.
Also look for slip resistance and water absorption, especially for outdoor or wet floors.
What are the pros and cons of different tile grades?
Higher-grade tiles show less damage, have even thickness, and hold up better.
They’re pricier but save time during installation and create less waste.
Lower-grade tiles cost less and offer rustic character, but you’ll spend more time sorting and patching, and they’re best for low-load spots.
Some lower grades are just right for accent walls or small repairs.
Can you explain how tile wear ratings affect grade classification?
Wear ratings show how well a tile stands up to surface abrasion.
Tiles with higher wear resistance get higher grades for floors and commercial spaces.
Lower wear ratings usually mean wall-only or light-traffic use.
Always match the rating to expected foot traffic, or you’ll risk the surface wearing out too soon.
What is the significance of water absorption rates in tile grading?
Water absorption tells you how porous a tile is and hints at freeze-thaw durability.
Low absorption (denser tiles) works for exterior floors and wet spots; higher absorption tiles might need sealing or be better indoors.
Grading takes absorption into account for assigning tiles to exterior, interior, or wet-area use.
Where can one find guidelines for the proper use of each tile grade?
Check out industry standards—ASTM tests and local building codes usually lay out the basics on strength, wear, and absorption.
Suppliers often have test reports or suggestions for use; don’t hesitate to ask for those before you commit.
Reclaimed Slate Roofing inspects and documents every lot. If you’re eyeing a particular grade, reach out for their notes, shipping times, and any advice they’ve got for where it’ll work best.